Va Beach v20 project

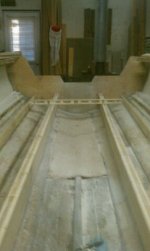
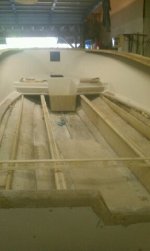
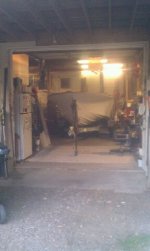
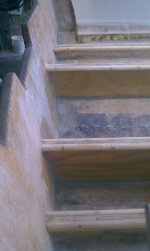
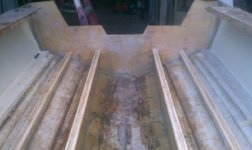
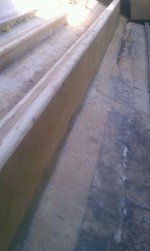
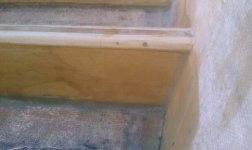
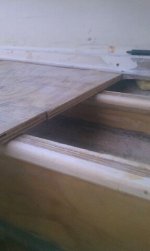
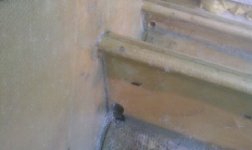
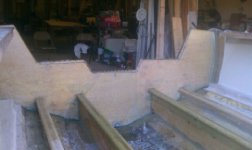
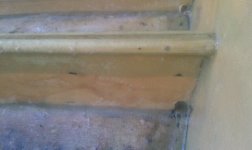
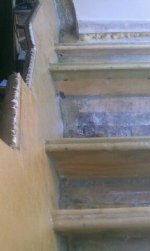
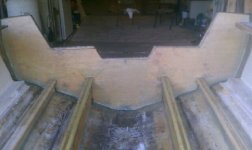
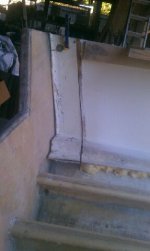
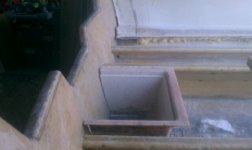
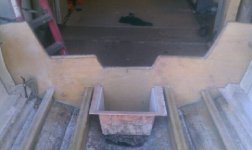
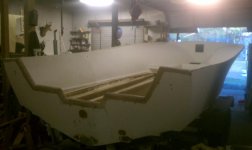
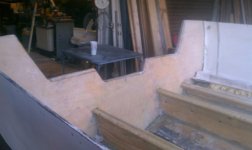
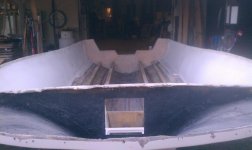
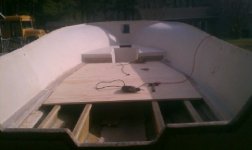
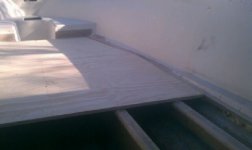
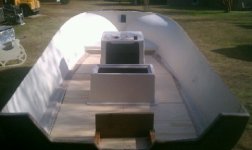
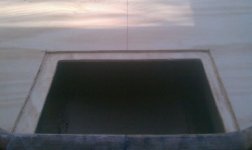
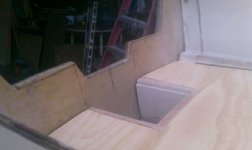
I have relocated the boat to my dads house, He has a very big shop that I can store it in until I get the stringers glassed in and sole glassed in also. I have some pics of the stringer cleats that i glued and screwed yesterday. I will be ready to glass the stringers in Saturday after I finish prep work on friday.
 

Attachments

  • CLEATS1.JPG
    CLEATS1.JPG
    25.5 KB · Views: 156
  • CLEATS3.JPG
    CLEATS3.JPG
    26.5 KB · Views: 150
  • CLEATS2.JPG
    CLEATS2.JPG
    24.8 KB · Views: 159
  • CLEATS.JPG
    CLEATS.JPG
    27.3 KB · Views: 142
stringer cleats and glassing stringers

I glued my stringer cleats on yesterday. and glassed in my main stringers today with one layer of 1708. the picture with the scrap 3/4 ply shows that i allowed some fudge room for the CSM that im gonna wrap the top of the stringers with and the glue for glueing down the sole.I also tabbed my stringers in before I put my last layer of 1708 on the transom, I kinda thought it would lock the stringers into the transom a little better.
 

Attachments

  • STRINGER CLEAT6.JPG
    STRINGER CLEAT6.JPG
    27.6 KB · Views: 128
  • STRINGER CLEAT2.JPG
    STRINGER CLEAT2.JPG
    42.4 KB · Views: 121
  • STRINGER CLEAT3.JPG
    STRINGER CLEAT3.JPG
    27.6 KB · Views: 168
  • STRINGER CLEAT4.JPG
    STRINGER CLEAT4.JPG
    37.9 KB · Views: 117
  • STRINGER CLEAT5.JPG
    STRINGER CLEAT5.JPG
    22.7 KB · Views: 122
WOW. I been busy and missed the progress. Excellent work. Looks strong as a tank. I often wondered about glassing the cap to the hull. Never tried that one. I have seen a few go fasts with no rub rail and a bunch of boats that have the liner glassed to the hull at the transom and gel coated from the factory with no issues. You are moving along. I hear you about the bubble popper rollers. You are neater at glassing than I ever was. I always say your not having fun glassing until you spend a few uninterrupted hours down in the hull sniffing VE Resin. Keep it up. :clap:
 
I've been in top-tier boat factories that weren't that well done!!!...NICE WORK!!...that'll not be your typical V20 once you're done...BEEFY V!!...


And your choice of shops to work on it...man I gotta hand it to ya!!...right beside the BEER FRIDGE!!...GENIUS!!...:clap:...You da MAN!!...:beer:
 
fellas thank you for the words of encouragement. I have to admit she is gonna be battle ready!!!! I have made sure that I have taken plenty of pictures because if werent for people like you guys on V20.COM and on other forums that take plenty of pics and documented there builds I wouldnt be doing this.Im gonna stay away from glassing the cap to the hull, there is way to much flex there and im sure its gonna turn out looking like poop after 5 or 6 monthes of fishing because it cracking. she is coming together and my splash time should be around late spring to early summer. Im waiting for one of you guys to sell me a cheap t-top for this rig!!! LOL!!! I will keep the pictures coming!!!
 
Last edited:
Waiting for this cold front to get out of here!!! Im gonna be glass the top of my stringers with 2 layers of 1.5 CSM on friday to simply encapsulate the top of the stringer. After that Im gonna fab up my chase pipe for my electronics and teleflex. still not quite sure how im gonna set that up with out it looking like crap. Any ideas or pics of your chase pipes would be great!!:beer:
 
The stringers are finally done and my last layer of 1708 is on the transom. All i have to do is put some thickened resin in the stringer drain holes then drill the holes 1 inch( I over drilled the holes 1 1/2 inch) to allow for a solid ring of glass around the drains to protect the raw wood. I also drilled my garboard plug a 1 1/2 and then used thickened resin reinforced with some chopped glass to fill the hole back and then drilled it 1 inch. A little more prep and then im ready for the sole. What should I do to water proof the bottom side of my 3/4 inch ply for my sole? 1 layer of csm?or should I just simply hotcoat it?
 

Attachments

  • 7.JPG
    7.JPG
    32.1 KB · Views: 104
  • 8.JPG
    8.JPG
    38 KB · Views: 90
  • 9.JPG
    9.JPG
    33.1 KB · Views: 87
  • 10.JPG
    10.JPG
    27.1 KB · Views: 90
  • 11.JPG
    11.JPG
    39.1 KB · Views: 89
I'm no expert, but I might leave the stringer drain holes 1 1/2". Might help keep them from getting blocked and water pooling against the stringer.
 
Bradford thats a good call. I will do that. I will just finger some thickened resin in there to cover raw wood. and then kinda touch it up with a dremel for easier flow.
 
Re-attached my liner pieces today with thickened resin.and also cut and prepped one of my old fish boxes that I removed from the floor as my new splash well. Just basicly did some prep for the sole today. I cant wait to get this floor in.:sun:
 

Attachments

  • 02.JPG
    02.JPG
    26.5 KB · Views: 114
  • 04.JPG
    04.JPG
    33.1 KB · Views: 119
  • O5.JPG
    O5.JPG
    36.8 KB · Views: 113
Removed the old cap yesterday. Im gonna build the cap up from scratch.
 

Attachments

  • CAP REMOVE.jpg
    CAP REMOVE.jpg
    28.2 KB · Views: 102
  • CAP1.jpg
    CAP1.jpg
    31.7 KB · Views: 92
  • CAP3.jpg
    CAP3.jpg
    38.6 KB · Views: 98
Looks like yer gonna take the floor all the way back to the tranny...will the floor have some "fall" to it to drain into the well...and I'm thinkin' the well will be complete w/pump(s) and drain-grate so nobody steps off into it in the heat of battle that's surely gonna erupt...:sun:...like the use of the partial floor hatch liner....:clap:
 
REEL yes I will have one bilge pump in the motor "splash" well and one below deck. The reason I even used the the fish box liner instead of the old motor well was because the fish box liner has the 3/4 inch recessed lip on it so I can drop in the drain grate made from teak to keep the boys from busting there butt in that hole. Im also going to have 2 ball scuppers at deck level on port and starboard.The floor has factory grade to the rear seeing how the stringers i installed are factory height.
 
Im also going to have 2 ball scuppers at deck level on port and starboard.The floor has factory grade to the rear seeing how the stringers i installed are factory height.


I had a '74 for 11 years...and your plan worries me a bit...the 70s models had floors set AT water level....later when Wellcraft went to a self draining floor deck, it was RAISED above water level to accomplish that function...if you install scuppers AT water level, even the ball type, will you have the draining capability you're looking for?
 
ball scuppers

My plan was to not install the scuppers till i splash it and find out floor height ( BUT IT WAS IN THE DRAIN PLANS) LOL!!. My dad had scuppers on his, but his was a 84'
 
My plan was to not install the scuppers till i splash it and find out floor height ( BUT IT WAS IN THE DRAIN PLANS) LOL!!. My dad had scuppers on his, but his was a 84'


That's why I brought it up as a concern...your dad's '84 was AFTER Wellcraft raised the floor and heightened the cap to make self-draining and put the fuel tank under the floor...good luck w/it and w/your skills, I'm confident if you install scuppers in wrong place, you can always reposition them...:clap:
 
Well today due to the holiday I was able to rough in my sole and also cut the hole for my splash "sump well". I recessed the rough opening on the sump liner hole so I can glue in my fabricated splash well and glass over the lip flush with the my glass for my sole.
 

Attachments

  • FLOOR.JPG
    FLOOR.JPG
    32.8 KB · Views: 123
  • FLOOR3.JPG
    FLOOR3.JPG
    28.6 KB · Views: 112
  • FLOOR1.JPG
    FLOOR1.JPG
    37.4 KB · Views: 120
  • FLOOR2.JPG
    FLOOR2.JPG
    28.2 KB · Views: 107
  • FLOOR4.JPG
    FLOOR4.JPG
    30.6 KB · Views: 119
Back
Top