Wellcraft, V20 and Steplift remain the property of the Wellcraft Company
Install the app
How to install the app on iOS
Follow along with the video below to see how to install our site as a web app on your home screen.
Note: This feature may not be available in some browsers.
You are using an out of date browser. It may not display this or other websites correctly.
You should upgrade or use an alternative browser.
You should upgrade or use an alternative browser.
Specs
- Thread starter tsubaki
- Start date
macojoe
Administrator
I was going to mount to the dash, then I hate to make more holes? But I like it on the throttle, so what I did was tape it in a few places and decided I liked it on the throttle arm, I used a wire tie and its perfect, works almost like a stock one! ;D
I am going to pick up another one soon, I hate having to get in and out the boat to tilt up and down, going to mout this one on the motor is self or transom?
I am going to pick up another one soon, I hate having to get in and out the boat to tilt up and down, going to mout this one on the motor is self or transom?
tsubaki
God
This is what you need to cut Starboard
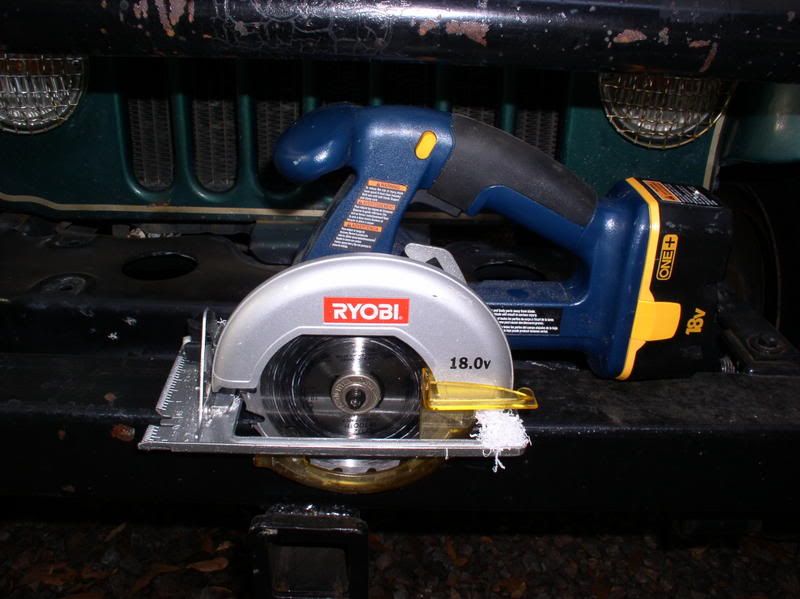
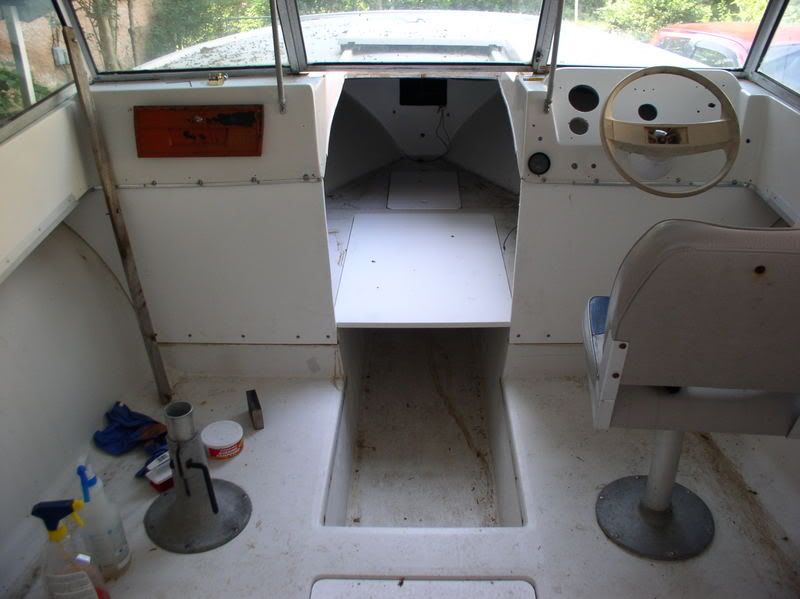
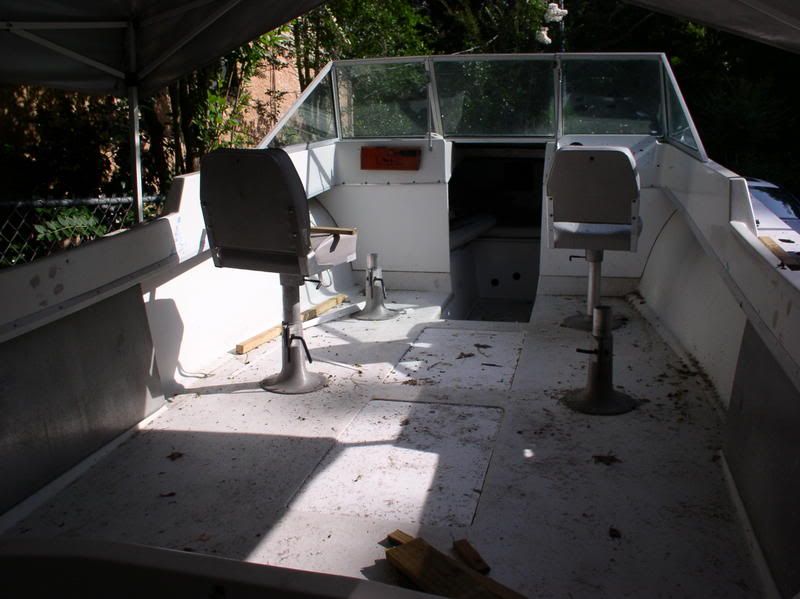
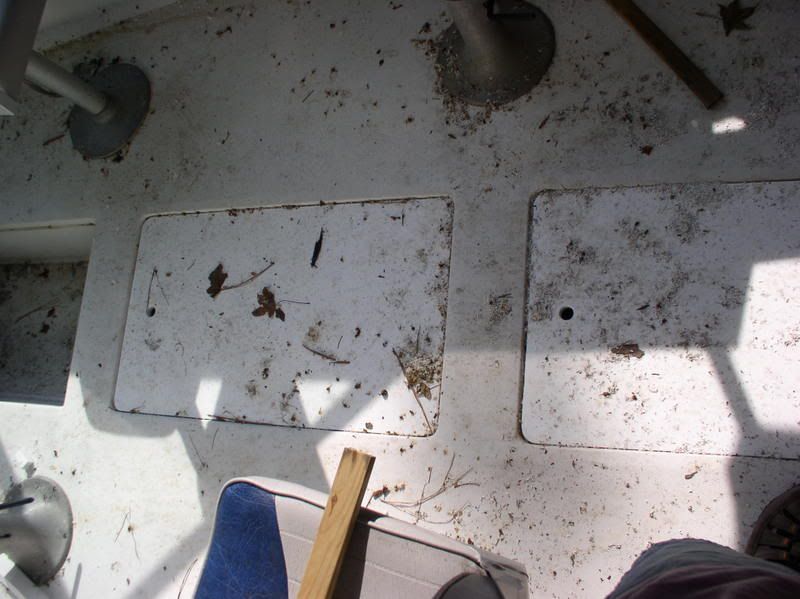
I (mostly) followed the instructions while ruff cutting the floor hatches and cuddy panels. When it got to the fine work of fitting out of lazyness got the battery saw out.
This thing cuts long, fine, etc, better than anything else.
The fact that it's low rpm does the trick.
I (mostly) followed the instructions while ruff cutting the floor hatches and cuddy panels. When it got to the fine work of fitting out of lazyness got the battery saw out.
This thing cuts long, fine, etc, better than anything else.
The fact that it's low rpm does the trick.
tsubaki
God
DELAYS, DELAYS.
Told Reel possibly a couple of weeks before splashdown, well that didn't happen.
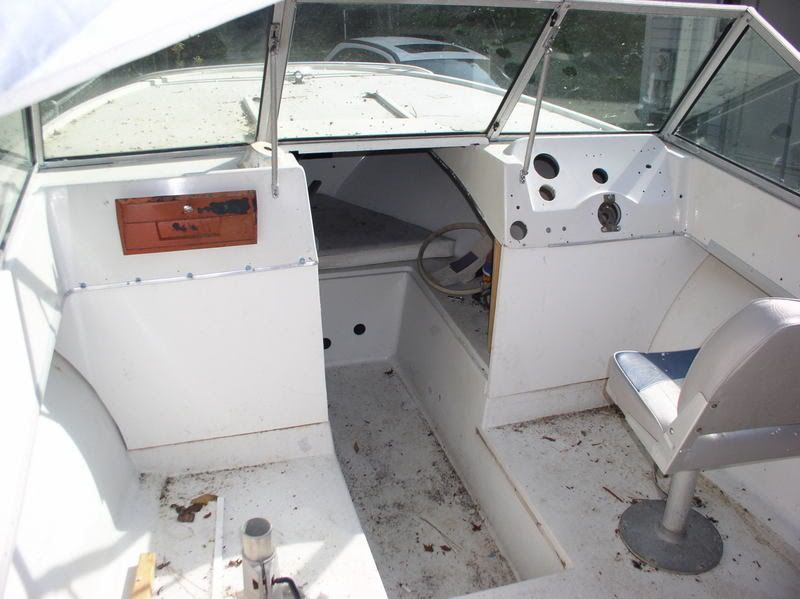
While starting to reassemble steering and other stuff, found the backboard to the steering to be too weak to support it. So I had to tear it out and replace it.
And not to meantion another excuse was ts Barry.
Told Reel possibly a couple of weeks before splashdown, well that didn't happen.
While starting to reassemble steering and other stuff, found the backboard to the steering to be too weak to support it. So I had to tear it out and replace it.
And not to meantion another excuse was ts Barry.
reelapeelin
God
tsubaki said:I have come to the realization that I'm not going to complete it the way I want, so I'm just going to get it to the point of "useable" to then see what changes I'll need to do.
"Splashdown" will be redefined as "test run", when that happens.
WOW, tsubaki!!...you makin' some reel headway on yer V
") ...lookin' good, Man!! Only thing I'm a little concerned about is tight gaps around floor hatches...this stuff E X P A N D S in hot weather, and if ya don't leave a lil' wiggle-room it'll make it difficult to lift those hatch-lids ... I know, I know...generally tight gaps ARE good ...
...lookin' good, Man!! Only thing I'm a little concerned about is tight gaps around floor hatches...this stuff E X P A N D S in hot weather, and if ya don't leave a lil' wiggle-room it'll make it difficult to lift those hatch-lids ... I know, I know...generally tight gaps ARE good ...macojoe
Administrator
you got the hard stuff done, thats all you need!!
Took me like 7 years to get mine to were it is today, just do a little every year, when the fish get here stop and wait till the fall & spring for repairs!
floor covers leave about 1/8 to 3/16 gap all the way around, thats pleanty of room for the expansion!
Took me like 7 years to get mine to were it is today, just do a little every year, when the fish get here stop and wait till the fall & spring for repairs!
floor covers leave about 1/8 to 3/16 gap all the way around, thats pleanty of room for the expansion!
reelapeelin
God
Gappage, Man!!...ya need some GAPPAGE!! ;D ...
tsubaki
God
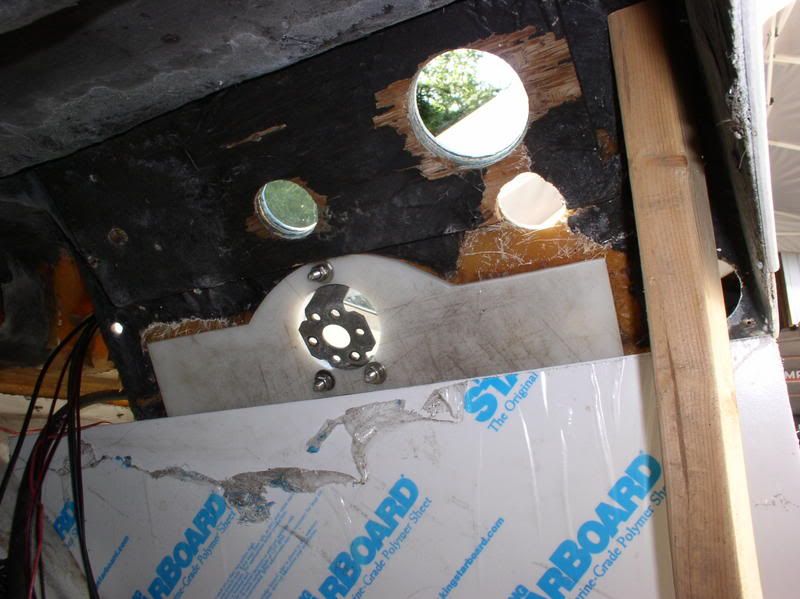
I didn't even think about expansion and contraction of that stuff. Well it was 97* yesterday and from what it remember it was about 85* when I took the pictures.
When I cut it, I felt that all the pieces were too small. I'll keep an eye on it, at least I can still cut some more off. ;D
When I cut it, I felt that all the pieces were too small. I'll keep an eye on it, at least I can still cut some more off. ;D
reelapeelin
God
tsubaki said:I didn't even think about expansion and contraction of that stuff. Well it was 97* yesterday and from what it remember it was about 85* when I took the pictures.
When I cut it, I felt that all the pieces were too small. I'll keep an eye on it, at least I can still cut some more off. ;D
Good news is you sized 'em HOT
... so ya oughtta be OTAY BUCKWHEAT!! ...