Specs

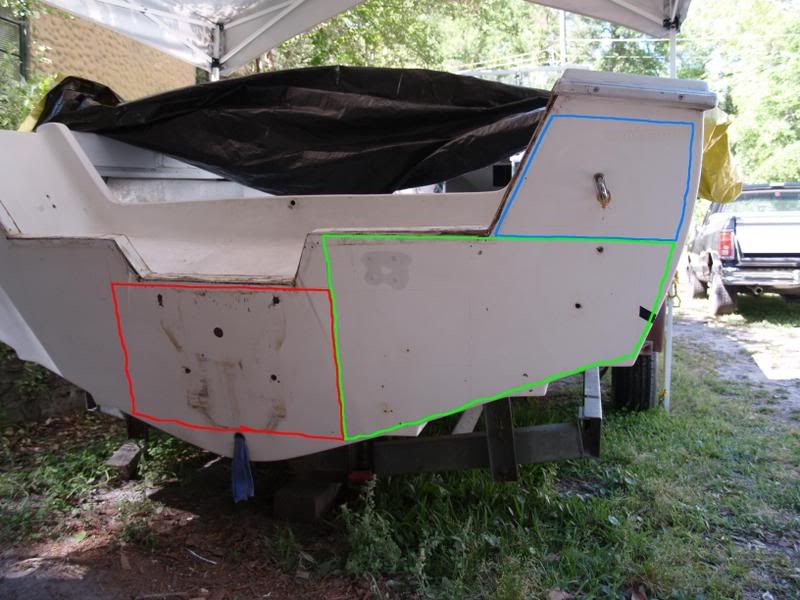
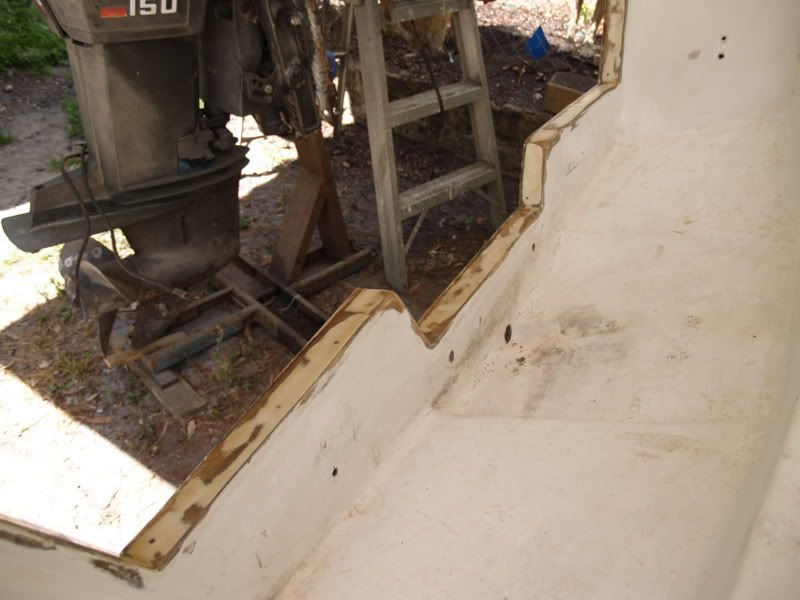
Then we dug out the transom with storebought and homemade tools, wifes 16” electric chainsaw, prybar, flat chisel, flat scraper, lost tool or bolt grapple, shopvac with 1 ¼” id hose extension.
tools.jpg

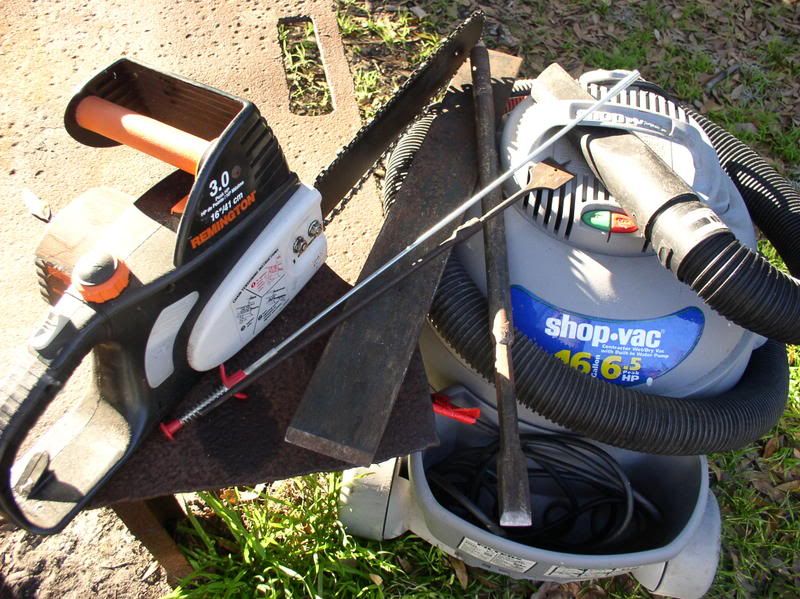
Don’t add oil to the chainsaw (figured if this works I can buy a new bar & chain), the flat scraper was cut on 45’ with a chopsaw and the weight alone did the work. 1 ¼” auger bits and paddle bits with a drill motor were only used for some very fine work. We didn’t cut or work above the rubrail, the rationalization was there is nothing structurally needed there plus it involves a lot more work.
 
Last edited:
Once we got the old wood out we cut some ½” pieces of fiberglass panel for the area’s shown for a total of 5 panels to be inserted.    
               
Picture.jpg

Picture028.jpg
 
 Look into the bottom as you vacuum the junk out and you will see voids between the different steps of the hull. What we did was anything bigger than 1” we cut a 1/8” panel of fiberglass from an old boat project and 5200ed it to the opening (this was in 2 locations).
CopyofPicture017.jpg
 
As you seen earlier the shims used were to maintain 2-2 1/8” for the backsplash glued with 5200,
Picture009.jpg

once this was done the only time other clamps were needed was when we worked up to within 4” of the transom, after that the glass had set so the clamps were no longer needed.
 
We shimmed the glass panels with pieces of scuff abrasive that is usually used with floor sanders.
Picture142.jpg

After plugging other cracks with the scuff pad we began the pour keeping the panels about center of inside and outside molded body.
 
I know you ain’t going to have the panels I had, you can make them up ahead of time and probably do better than we did by making them about 1” thick and pouring glass between the hulls and panel. The inside of the transom was comprised of ¾ & ½” pieces of plywood which came to 1 ¼” inside thickness. I wouldn’t worry about trying to make the panels perfect, most of the strength need will be directly around the motor bolt on area. Once you pour and stuff cloth as a filler it will be fine. I calculated that it would take about 8 gallons of pure resin to fill the transom if no cloth was used. Just guessing if you built the panels you would need about 18yards of ¼ woven cloth and 6 gallons of resin.
 
We kept pouring and packing until we got to the top of the backsplash then cut the cap into 3 pieces
CopyofPicture021.jpg

and taped the lowest piece in place then moved to the sides pouring and packing as we went until we got level with the top of the sides and poured and packed and taped to keep it all in place. Oh don’t forget to tape under the backwash for escaping resin.
Picture027.jpg

This is the cap after leveling with cloth and resin, so to not have cracks between the different hull molds.
I have to see what happens with the cleanup of adjacent areas before deciding on paint or Marine-Tex.
 
I didn't have time to take pictures as we went so the reason for the after pictures being colored. Let me know what don't make sense. I'll also try to proof read and edit some of the posts.
 
Great Pics. I got lost when you posted a pic. of that sqare piece of glass. You inserted them into the transom and then poured over them ??
 
Yeah the picture before the square glass is the sizes of the square glass we cut to go in the transom. The red, blue and green outlines for a total of five pieces.
Picture.jpg
 
And to make darn sure we filled the assend completely I cut a plug out with the Roto-Zip and drilled a 1 1/4'' hole in the direction of the backsplash and finished off pouring and packing.
Picture026.jpg

Now all I have left is the purty up part.
 
As if I didn't have enought to do.
Picture032.jpg

Got annoyed that the Mariner needed a starter to check the compression (or at least cleaning the brushes) so we found another prospect. ;D ;D ;D ;D ;D ;D
 
Back
Top