Removed my deck

Liam

Member
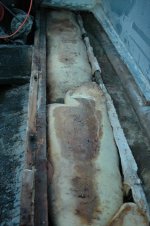
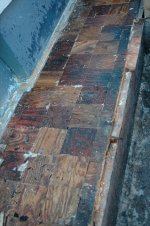
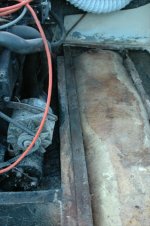
So it is time to start the overhaul of my 73 cuddy. I cut out the deck last weekend and found a real interesting set up underneath it.
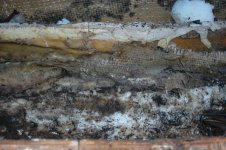
Although the original construction was pretty shoddy there looks to have been some equally crappy repairs in the past. I have enclosed some pics for your amusement.

The girders are original and do have some roven woving on them here and there,looks like it was thrown on from a distance.

I am a little confused about the main stringer,i know someone has added the stringer closest the keel but is the outer string original or was that added at the same time? Neither has any glass on them.
 

Attachments

  • stringers 001.JPG
    stringers 001.JPG
    64.8 KB · Views: 295
this is how you do it the right way:oh:

16 penny nails everywhere
 

Attachments

  • stringers 008.jpg
    stringers 008.jpg
    47.6 KB · Views: 232
here is how you glass in a girder at the wellcraft factory
 

Attachments

  • stringers 007.jpg
    stringers 007.jpg
    54.8 KB · Views: 248
probably gain a few knots when I remove the couple of hundred pounds of doubled up 2x12 stringers
 

Attachments

  • stringers 004.JPG
    stringers 004.JPG
    65.7 KB · Views: 199
GW- None of our boats would have been built had Wellcraft heeded those words. LOL ! I like solid sawn 2x12 for stringers. You did open up a can of worms didn't you.

Gut check = That moment, right after the Wallet check!

Your demo looks good and you certainly got to the root of a lot of evil, fast.
 
Mine actually looked pretty good with the exception of the fuel tank compartment with all the foam trapping water and gasoline.

I think it was Skools who said the small squares with the alternating grain actually made the deck stronger.

I would think this would have to be the case vs the ease of just glassing a couple of large sheets of ply. Even if they were getting the ply wood scraps for free I don't think they would be saving.
 
The foam was remarkably dry,as was the port side stringers. I cut the transom cap off,that needs recoring.I plan to remove the rest of the foam,and clean up a little then pull the motor in the next couple of weeks(depending on weather) and figure out the transom,i know its toast,at least around the outdrive,likely totally at the bottom.
 
your going at the project the rite way , take your time slow and steady and keep a photo log of all you do during the rebuild , looks good so far
 
I removed all the foam today,it was pretty wet at the stern,probably due to the deck drains emptying onto it.lol

thanks for all the words of support
 
Liam you're gonna be really pleased w/the finished boat once you're done...all the work will be well worth it...:clap:

The '86 Cuddy I've got in the For Sale section needs about this same level of work and will be a great boat once it gets this kind of TLC...:sun:


Like Wolfe said, keep the pics coming...looks like a great project to keep up with...
 
Removed the motor today, it was a breeze. Although the oil pan appears to have quite a few jb weld patches on it. Looks like I will be replacing that. The front motor mount adjustment is seized beyond repair also.
Motor mounts seem to be in plentiful supply on ebay , not too many oil pans around though, seems they are discontinued.
I will add more pics once I get the transom plate out.
 
Most of those pans are just truck pans I think. Try taking yours to a junkyard & see if you can find a match.
 
Most of those pans are just truck pans I think. Try taking yours to a junkyard & see if you can find a match.

Yes they are, A friend of mine may have one for me.

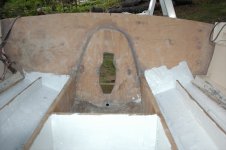
I removed the transom plate yesterday.Remarkably the wood around the key hole was still solid,the transom where the stringers tie in,not so good. There was also a kicker motor on the boat at some point,delaminated there also. Hope to start cutting next weekend,meanwhile I will work on removing 40 years or grease from the tansom plate:laugh:
 
Liam, I did almost the same thing to mine except I did'nt pull the cap off. I used all 3/4 marine plywood for my transom and glassed it all back in, even the inside of the keyhole. I built a new motor bed and had to replace a section of the stringers in that area. Used alot of woven roven and about nine gallons of resin. It seems a little heavy in the rear but has held up great. Turned out well, havent had any trouble with it since I did it in 2006. Got some pics around here somewhere, Ill try ta find them.
 
Liam, I did almost the same thing to mine except I did'nt pull the cap off. I used all 3/4 marine plywood for my transom and glassed it all back in, even the inside of the keyhole. I built a new motor bed and had to replace a section of the stringers in that area. Used alot of woven roven and about nine gallons of resin. It seems a little heavy in the rear but has held up great. Turned out well, havent had any trouble with it since I did it in 2006. Got some pics around here somewhere, Ill try ta find them.

Hi,thanks for the info. I didn't remove the cap either,i just cut out the deck up to the bulkhead,the stringers seem ok towards the front and I just plan to tie into them.
I have checked out your gallery in the past,you have done a great job,i hope mine looks as good some day.
What wood did you use for your fish box covers? Mine are glass and it good shape but yours look pretty classy,how does the finish hold up?
 
I removed the stringers this morning and the center built up area of the transom. As soon as the snow melts I plan to get the boat off the trailer and remove the rest of the transom but until then I need to keep the stern lifting rings in place.
 

Attachments

  • stringers removed 001.jpg
    stringers removed 001.jpg
    44.2 KB · Views: 99
sorry for not updating along the way,it has been tough finding time to work on the boat.
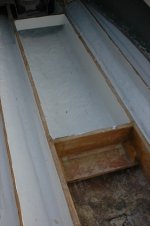
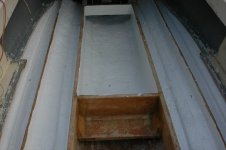
The stringers and transom are done,just need one more layer of tabbing up the transom side. I have Thursday and Friday off and hope to get the deck in.
I had some epoxy paint left from another project so used that up and freshened it up. Once the deck is in I can finish up the bilge and bilgekote that area.
 

Attachments

  • stringers 001.JPG
    stringers 001.JPG
    41.4 KB · Views: 125
  • stringers 002.JPG
    stringers 002.JPG
    72.4 KB · Views: 121
  • stringers 003.JPG
    stringers 003.JPG
    83.1 KB · Views: 118
Back
Top