New to the v20 forum

New to the v20 forum just wanted to introduce my-self and say thanks in advance because I'll need it..

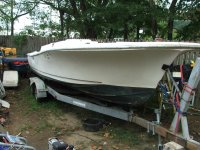
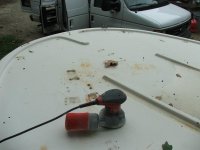
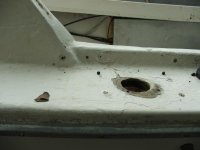
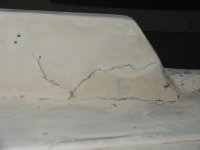
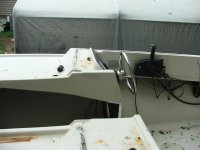
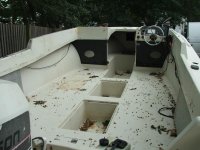
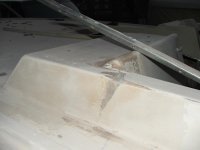
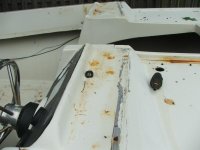
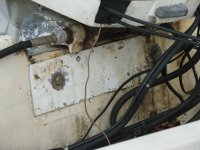
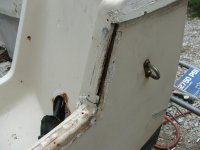
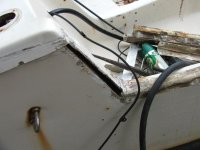
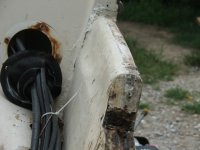
Last week picked up a 1973 v20 steplift with a 140 V4 Johnson. The owner was going to trash the boat and just sell the trailer for 800.00 But I just could not let him destroy that old girl. Brought her home to meet the wife ((surprise))). Have the whole boat stripped down and getting it ready for paint , Wiring ,well everything. For the most part the hull and transom are in good shape just a ton of screw holes to repair and a few cracks. Being a contractor it amazes me that very few people will take that extra time to do it right but have plenty of time to fix the same thing over and over...I am looking for a Newer windshield if anyone knows where to find one.Tried E-bay and some local boat yards...Will post pic soon... Thanks for a great forum Ken
 
Hi Ken, welcome to the site. Look up Lumberslinger.. you guys can trade ideas since he's also a contractor. I think I know the boat you bought, saw the same ad and was saddened to think she was going to be scrapped. Glad you've given her new life. If you need anything, just ask.. I'm confident that someone here can point you in the right direction.. there's a wealth of knowledge available here.. all yours for the asking. These are great people to be around.. :fam:
 
Being a contractor it amazes me that very few people will take that extra time to do it right but have plenty of time to fix the same thing over and over...Will post pic soon... Thanks for a great forum Ken
Einstein said, “The definition of insanity is doing the same thing over and over again and expecting a different result.”

Welcome to the crazy farm. Let's see some pics of the progress. :hi:
 
Little bit of all three Road King Cole. Over all I could be out doing a lot worst things then staying home and working on the boat so the wife does not say to much besides get it done so we can take it out. That and It's a little to late ones it's home....

(((CRAP THE WIFE'S HOME RUUUUUUNNNNN))) That helps too
Just kidding she's always been great with this kind of stuff

Still prepping the boat for paint found three Bad cracks that were repaired before topside at least. Done by a 3rd grader , I had to rip off all the old so called glass work off and start fresh mainly for piece of mind and not to mention I would prefer not to see the repair.. Still looking for a complete windshield set or just have to rebuild the old one.Was thinking of making one out of wood just to be different any thoughts???
Will try tonight to upload pic

THE only chain is on me SHORT ONE at that
 
Last edited:
Not sure if it was the one on Craigs List but the owner was going to scrap the boat and sell the trailer.I'd rather sell or scrap the trailer and put the money into the V20 any day.Everyone around here thinks I've lost my mind again...We'll see besides I like making people eat their words.....Thanks for all help////
 
Pic

Mainly work in New Jersey or if you were asking about the repairs to the boat most of the time at home or if needed at a buddys shop..

Her are a few pic. No one laugh too hard just give me a few weeks she'll look and run almost like new or better.

Some of the pic show what not to do when making glass and crack repairs been piling off most of the old repairs. Starting today with laying the first set of glass mat...
 

Attachments

  • DSCF2983.jpg
    DSCF2983.jpg
    96.7 KB · Views: 29
  • DSCF2985.jpg
    DSCF2985.jpg
    41.1 KB · Views: 29
  • DSCF2993.jpg
    DSCF2993.jpg
    41.3 KB · Views: 28
  • DSCF3015.jpg
    DSCF3015.jpg
    24 KB · Views: 30
  • DSCF3018.jpg
    DSCF3018.jpg
    22.4 KB · Views: 29
Here are a few more pic. Going to pull the motor and really check out the transom seems to be all right but not great...Does anyone have pic of the second sliding door for the cabin trying to make one or buy..Thanks Again Ken
 

Attachments

  • DSCF2986.jpg
    DSCF2986.jpg
    45.2 KB · Views: 22
  • DSCF2998.jpg
    DSCF2998.jpg
    63.1 KB · Views: 26
  • DSCF3017.jpg
    DSCF3017.jpg
    34.7 KB · Views: 25
  • DSCF3013.jpg
    DSCF3013.jpg
    41.7 KB · Views: 25
  • DSCF3009.jpg
    DSCF3009.jpg
    63.9 KB · Views: 24
Question on the transom? Pulled the motor and the transom seems very soid but the previous owner installed a back plate as seen in pic just a junk peace and not the right size and it crushed the inside of the transom about 1/8'' in would I be able to install a larger u-shaped peace and make the glass repair.Or should I just rebuild the whole transom because the being a 73...Thanks again
 
Question on the transom? Pulled the motor and the transom seems very soid but the previous owner installed a back plate as seen in pic just a junk peace and not the right size and it crushed the inside of the transom about 1/8'' in would I be able to install a larger u-shaped peace and make the glass repair.Or should I just rebuild the whole transom because the being a 73...Thanks again


Dry wood lasts a looooooong time. There are buildings that are over a hundred years old that are still standing. Just because your boat is a 73 doesn't mean it's time to replace everything. Test first.


3 simple tests for your transom

1) TAP the entire transom area with the back end of a screwdriver or use a rubber mallet. I prefer the hard tap of a screwdriver, other's prefer the thunk of the mallet. Either way is good. What you are listening for is a hollow sound. If you find an area that sounds hollow it's an indication of possible trouble.

2) FLEX Lift your motor to trailer position, then pull up and push down on
the lower unit while observing the transom. It should be rock solid and not flex. If it does you have a problem.

3) DRILL a small hole anyplace that sounded hollow in the tap test. Look at the wood chips that come out. If they look like good wood you're ok. If it looks like mush or oatmeal or rotted wood, you have a problem area.

4) SCAN Ok, ok, I know I said there were 3 tests, but there's a 4th way of testing also. If you have it available*, you can use something called thermal imaging. In industry we use it all the time to detect where there are leaks on built up roofs of buildings. After being in the sun all day, at night places where water is present will cool at a different rate than places where there is solid wood or metal. That difference will show on a thermal scan as different colors. So you use a thermal camera to scan the transom and it will show you any temp differences in the transom as color changes. Since water is a better conductor of heat then air, wet areas will cool faster than dry areas. Blue & green colors will be cool areas that are wet and reds and yellows will be warmer areas that are solid wood. You have to do the scan just after sundown as the transom is starting to cool down for the night.

*Remember, I'm talking about a $2000+ industrial camera, not something you buy at Harbor Freight for $39.99.
 
Thanks Destroyer for the info. Before I pulled the motor this morning I was doing as you stated with moving the motor up and down with not any movement but did notice a very little flex right in the center just below the water line. Did the tap test sounded solid except near the foremost port and starboard side near the water line. Do you know if the transom on the V20's are straight across or is there a very minor bow affect. This would be a an out board model... Just don't want to redo the transom and fine that everything was fine, Thanks for any help
 
The transoms are definitely not straight across. There is an outward bow to the transom--hard to notice with the naked eye, but put a 6-8' length of 2x4 on the transom and you will easily see it. Oops, you have a motor on there though, so just put a straight piece of wood on each side of the motor and you will be able to see it.
 
Thanks Nipper. Looks like I will be rebuilding the transom a few hollow sounds when I did the tap test on both sides. I've already gone this far so why not just pore in a new one and never have to worry about it again. I was able to find 6011 for 89.00 per gallon not sure if that's a good price or not.Does any one know how many gallons I would need....
 
Hollow sounds are an indication,... not a death sentence. If you have hollow sounds that's where you should drill pilot holes to be sure. It could just be the fiberglass and the wood are not touching (bonded to each other) anymore from a lot of reasons (like drying out over the years, etc).
Drilling the holes and then sealing them up again could be a lot cheaper than taking it apart only to find that the only thing wrong was your taking it apart. :head:
 
Oh man, thanks for the pictures!
Let me throw a couple of bugs in the mix while you are able to go from where you are now.
Hows about adding foam in the bottom?
While doing this, what about raising the floor an inch or so to make it self bailing?
While contemplating all this, what about maybe a belly tank but leaving the floor boxes?
It's only money and time.
Sorry, these are some afterthoughts from getting mine water ready.
Please keep up with the picture progress.:clap::clap:
 
Thanks for everyone's help so far this old girl needs it. After getting in to it a little more today. I drilled a few holes to see how far gone it was.To my surprise the wood looked like wood but was a little wet from the top cap not being sealed right. Wanted to see what everyone else thinks. To me the transom looks like it was already replaced and not that long ago. I believe they removed the top cap and I mean the whole or at least half of the top of the boat which would explain the other cracks on the top port side.The only movement I get is about an 1/8 play on the starboard side where they did not glass over just filled it with silicone the port side had a little glass work done but not that great but no movement. My main question is should I just rebuild both corners of the transom and drain pan.In the one pic side view of the transom you can see the top 4inch or so is inset more then the rest all the way across even in the center notch is this normal or should it be the same thickness all the way. See what you think....Thanks
 

Attachments

  • DSCF3023.jpg
    DSCF3023.jpg
    62.9 KB · Views: 18
  • DSCF3025.jpg
    DSCF3025.jpg
    44.7 KB · Views: 17
  • DSCF3027.jpg
    DSCF3027.jpg
    49.7 KB · Views: 17
  • DSCF3031.jpg
    DSCF3031.jpg
    45.6 KB · Views: 17
Back
Top