J
JeffXJ
Guest
Goodbye!
I know it's been a while since I posted, but while I've lurked from time to time I have managed to make a little headway on my V20 and in hopes of forgiveness :-* offer these pic to the v20 gods (as well as senior, junior, and other members...) ;D
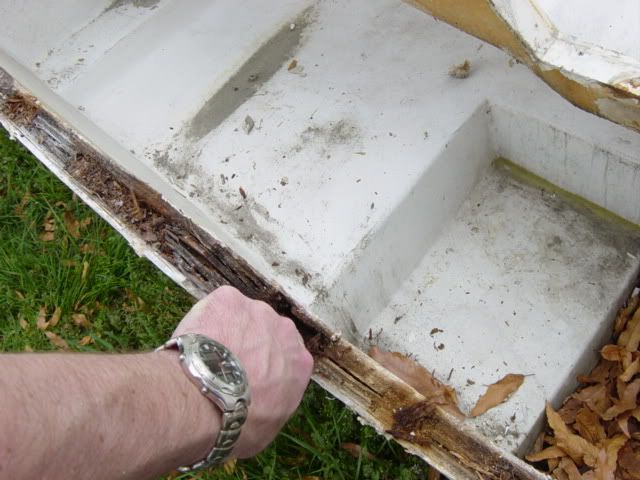
Here's where I'm putting my finger through the " 'little-bit soft" transom.... Even though you could say I was fingering my transom, it's not what you think...really... :")
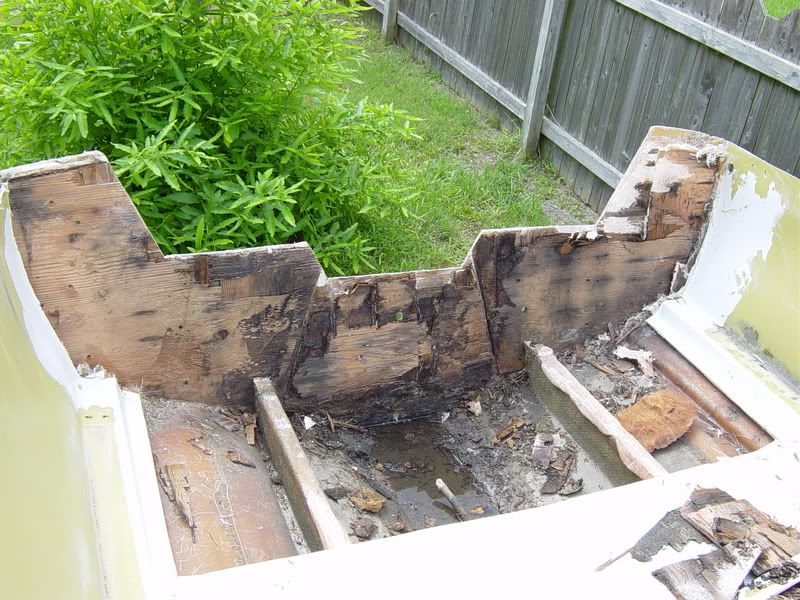
This is after I already removed the inner skin as well as the inner piece of plywood and some of the floor for better access. For those of you who may not have had the "pleasure" of experiencing this fun they nailed two sheets of plywood together for the core of the transome...at least on my boat. The lesson here is if you every want the experience of re-coring a transom let it be on someone else's boat. After the first couple of hours it's not fun anymore...

An interesting note here: I found foam under the floor! I didn't think Wellcraft used foam in '71. Am I wrong or would that just happen to be the handi-work of a previous owner?
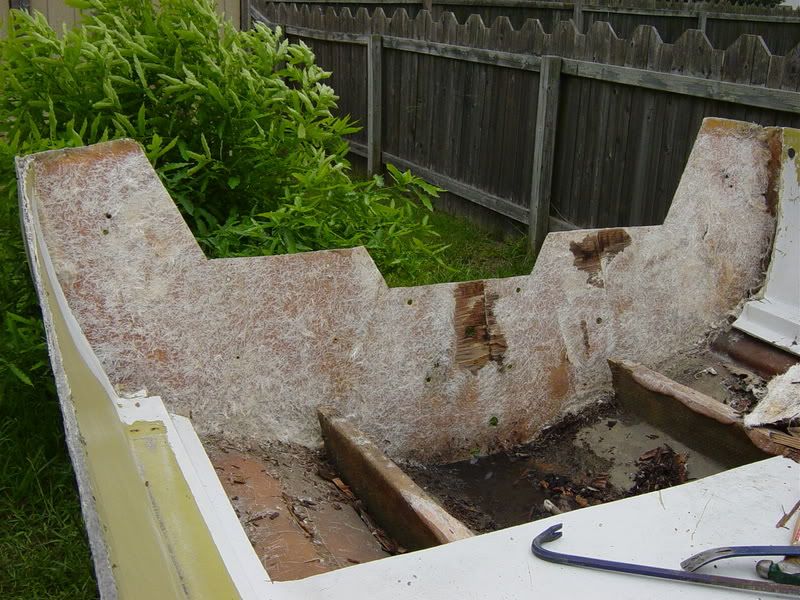
All done (at least with hammer and prybars)! Good thing too! I lost count of how many times I missed the prybar and hit my left hand Luckily I'm a righty... ;D
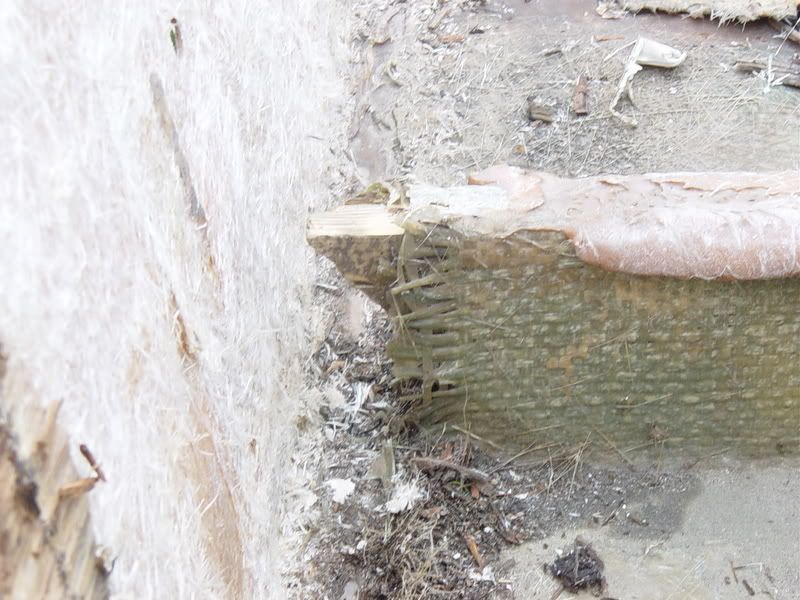
I took this last picture because I wasn't expecting to see the stringer like this. Notice the angle cut into the string so only the top was actually making contact with the transom? I'm thinking I should change this so the stringer buts up to the transom flush. I was also considering putting in knees (I hope that's the technically correct term :-[ ) Any suggestions here?
I still have some sanding and figuring to do, but I'm hoping to get the new core in this week since I have some time off of work. Hopefully the next pics I post will be of the transom being closed in and cored with coosa board. By the way, I tend to do things the hard way, but if anyone has some suggestions, tips, or tricks they'd like to share I'm all ears! ;D
I know it's been a while since I posted, but while I've lurked from time to time I have managed to make a little headway on my V20 and in hopes of forgiveness :-* offer these pic to the v20 gods (as well as senior, junior, and other members...) ;D
Here's where I'm putting my finger through the " 'little-bit soft" transom.... Even though you could say I was fingering my transom, it's not what you think...really... :
This is after I already removed the inner skin as well as the inner piece of plywood and some of the floor for better access. For those of you who may not have had the "pleasure" of experiencing this fun they nailed two sheets of plywood together for the core of the transome...at least on my boat. The lesson here is if you every want the experience of re-coring a transom let it be on someone else's boat. After the first couple of hours it's not fun anymore...
An interesting note here: I found foam under the floor! I didn't think Wellcraft used foam in '71. Am I wrong or would that just happen to be the handi-work of a previous owner?
All done (at least with hammer and prybars)! Good thing too! I lost count of how many times I missed the prybar and hit my left hand
Luckily I'm a righty... ;D
I took this last picture because I wasn't expecting to see the stringer like this. Notice the angle cut into the string so only the top was actually making contact with the transom? I'm thinking I should change this so the stringer buts up to the transom flush. I was also considering putting in knees (I hope that's the technically correct term :-[ ) Any suggestions here?
I still have some sanding and figuring to do, but I'm hoping to get the new core in this week since I have some time off of work. Hopefully the next pics I post will be of the transom being closed in and cored with coosa board. By the way, I tend to do things the hard way, but if anyone has some suggestions, tips, or tricks they'd like to share I'm all ears! ;D
 Shouldn't be an issue with this one though, Coosa doesn't rot (so they say). 8)
") 8) ...
8) ...