Console, T-top, deck and more...

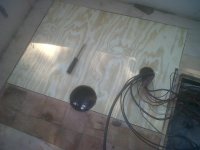
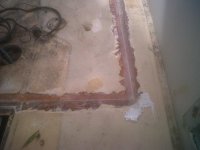
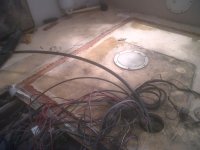
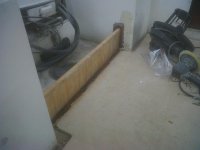
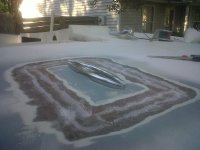
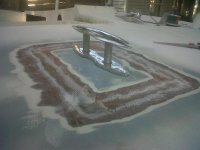
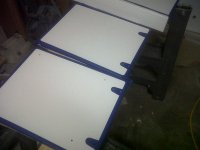
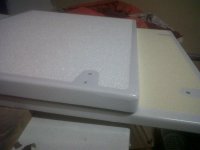
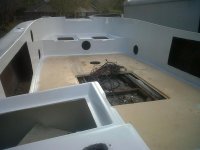
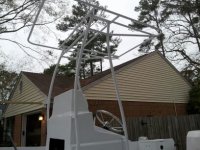
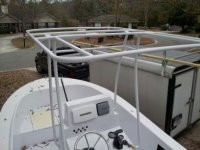
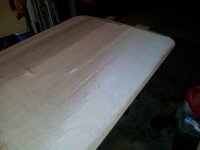
Not much to show but an update none the less. I got the new ply and top skin epoxied in yesterday and this morning I glassed the top side.

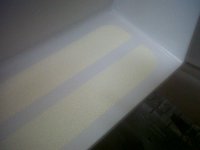
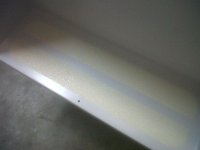
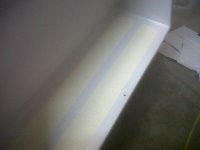
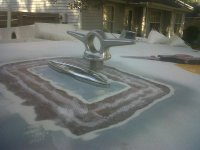
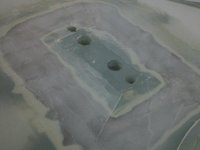
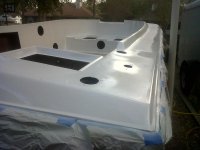
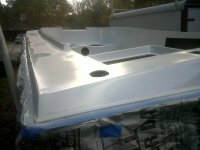
I am thinking about sanding my non-skid off instead of filling it with fairing compound. Seems like it would be easier in the long run.
 

Attachments

  • IMG00480-20111006-1503.jpg
    IMG00480-20111006-1503.jpg
    45.9 KB · Views: 61
  • IMG00482-20111007-1158.jpg
    IMG00482-20111007-1158.jpg
    44.8 KB · Views: 58
  • IMG00484-20111007-1158.jpg
    IMG00484-20111007-1158.jpg
    58.1 KB · Views: 57
Just in case anyone has wondered, it is a royal pain grinding and filling spider cracks. I never noticed I had so many until I started on them today.
 
I got my Kiwigrip in today from Boat Builder Central. Nothing but good things to say about them and the product. It says on their site that it comes with a 3" roller, I opened up the box and saw two. The shipping was super fast. About 1 1/2 days to my door.

I am impatient so I decided to put some Kiwi on the console foot rest. It took longer to mask everything than it did to roll it. I spread it with a notched trowel and rolled it with the special roller cover. It rolled out nicely and left perfect lines when the tape was pulled. Pics aren't that great as it looks much better in person.
 

Attachments

  • IMG00485-20111007-2150.jpg
    IMG00485-20111007-2150.jpg
    34.7 KB · Views: 75
  • IMG00486-20111007-2151.jpg
    IMG00486-20111007-2151.jpg
    36.4 KB · Views: 66
  • IMG00487-20111007-2151.jpg
    IMG00487-20111007-2151.jpg
    33.8 KB · Views: 59
It's the same boat. She got a paint job a while back and is now "fighting lady yellow".

That looks GREAT!!...gonna be a nice package when done...:clap:

Do you pull the tape after the Kiwigrip is DRY...or just after application while still wet?
 
Last edited:
Progress has been made but not a lot to show for it. There is not much satisfaction in sanding, filling, sanding, filling and sanding some more...

I did get the splash-well glued and filleted in. I am gonna have to grind back some more gel coat before I lay any glass but it's just about ready. I will see how I like it when I splash the boat but I may be making it a bit higher.

I did get the hatches painted and non-skid applied.
 

Attachments

  • IMG00497-20111016-1838.jpg
    IMG00497-20111016-1838.jpg
    36.8 KB · Views: 55
  • IMG00501-20111018-2107.jpg
    IMG00501-20111018-2107.jpg
    53.7 KB · Views: 56
Bradford, how is your project coming along? I would be interested in seeing some of your progress pics.


Project coming along slowly but surely. Fiberglass man had to lay off ALL his workers due to the dismal economy and is finishing up mine and one other boat before having to move out of his facility. He is old school and OCD when it comes to sanding, fairing, and finishing and has told me three different times that the paint process would begin by the end of the week. I feel bad for his situation, but feel that I will benefit greatly from him doing most of the work instead of others that don't have to put their name on it.
 
That sucks Bradford, aren't you using Adams here in Richmond Hill? At least it's in competent hands.

Little progress has been made. I am swamped with work and working during the weekends to get caught up. I had a couple of hours to spare today so I worked on the pop-up cleat area.

The boat originally had a 6" cleat that connected to the bow eye via a threaded rod. The cleat was a toe stumper for sure and caught the cast net up a lot.

I cut the top cap around the cleat and removed a little bit of rotten wood. I put a nut on the threaded rod and screwed it below the deck. I then took two washers and cut a slot in each of them to make a c shape. I put them above the nut below deck and installed another nut above deck. Tightened the nut below deck to secure everything as one. I bed the top nut in epoxy glue making it part of the deck.

I did some glassing a fairing of the area today.
 

Attachments

  • IMG00515-20111023-1641.jpg
    IMG00515-20111023-1641.jpg
    43.2 KB · Views: 74
  • IMG00508-20111023-1639.jpg
    IMG00508-20111023-1639.jpg
    50.1 KB · Views: 79
  • IMG00507-20111023-1639.jpg
    IMG00507-20111023-1639.jpg
    44.5 KB · Views: 75
  • IMG00509-20111023-1640.jpg
    IMG00509-20111023-1640.jpg
    51.9 KB · Views: 73
  • IMG00517-20111023-1714.jpg
    IMG00517-20111023-1714.jpg
    34.3 KB · Views: 69
Last edited:
Project coming along slowly but surely. Fiberglass man had to lay off ALL his workers due to the dismal economy and is finishing up mine and one other boat before having to move out of his facility. He is old school and OCD when it comes to sanding, fairing, and finishing and has told me three different times that the paint process would begin by the end of the week. I feel bad for his situation, but feel that I will benefit greatly from him doing most of the work instead of others that don't have to put their name on it.

Bradford...keep the patience up...easy for me to say, but sounds like you got the right guy on it and it'll payoff in the work you get back...

Curapa, thanks for the tip on tape pulling...sounds like a small item, but imagine not knowing, waiting til dry and then effin' up a paint job...you do good work...like the cleat install...:clap:
 
I got the white Kiwi in today so I did the hatches for the top side. Around the top cap will be white, then cream on the deck.
 

Attachments

  • IMG00520-20111024-2009.jpg
    IMG00520-20111024-2009.jpg
    42.5 KB · Views: 55
  • IMG00524-20111024-2034.jpg
    IMG00524-20111024-2034.jpg
    40 KB · Views: 57
I got the white Kiwi in today so I did the hatches for the top side. Around the top cap will be white, then cream on the deck.


Man...yer good...:clap:...I like to texture of the Kiwi Grip...enough to be effective, bit not too aggressive to be uncomfortable...looks like bare feet in the summer will be OK...
 
Man...yer good...:clap:...I like to texture of the Kiwi Grip...enough to be effective, bit not too aggressive to be uncomfortable...looks like bare feet in the summer will be OK...


Thanks Reel, the product just makes me look good. Definitely bare foot friendly.

I am close to painting the topside now, just some fairing in the splashwell area left. I can't wait! I wanted to be done with this by the end of Sept. to use it for this prime fishing time. Oh well, looks like early Nov. instead.
 
Curapa I have a few questions. What O.D. emt did you use? did you get the pre bent 90 degree elbows? is that a plumbing fitting you used for the mounts on the console? appreciate the info!
 
I got the first coat of paint on today. I did not spray where the non-skid will go on the topside because I felt it was a waste. I will be spraying the deck white but I did not have enough daylight for that today.
 

Attachments

  • IMG00558-20111109-1657.jpg
    IMG00558-20111109-1657.jpg
    49 KB · Views: 52
  • IMG00559-20111109-1658.jpg
    IMG00559-20111109-1658.jpg
    48 KB · Views: 49
  • IMG00560-20111109-1658.jpg
    IMG00560-20111109-1658.jpg
    51.8 KB · Views: 47
  • IMG00561-20111109-1658.jpg
    IMG00561-20111109-1658.jpg
    44.1 KB · Views: 47
Here are some pics of what I have been up to.
 

Attachments

  • Imported Photos 00024.jpg
    Imported Photos 00024.jpg
    31.1 KB · Views: 47
  • Imported Photos 00031.jpg
    Imported Photos 00031.jpg
    26.5 KB · Views: 45
  • Imported Photos 00034.jpg
    Imported Photos 00034.jpg
    29.3 KB · Views: 50
  • Imported Photos 00039.jpg
    Imported Photos 00039.jpg
    42.3 KB · Views: 44
  • Imported Photos 00045.jpg
    Imported Photos 00045.jpg
    30.3 KB · Views: 48
Got the glass going on the top tonight.
 

Attachments

  • Imported Photos 00048.jpg
    Imported Photos 00048.jpg
    15.8 KB · Views: 33
  • Imported Photos 00036.jpg
    Imported Photos 00036.jpg
    47.1 KB · Views: 34
Back
Top