92 V20 Cuddy Update

duckdive101

New member
Thought I would throw out an update since the season is wrapping up and I've done more work on the new boat than taking it out on the water. It seems to be 30+ winds every weekend since I brought it home.

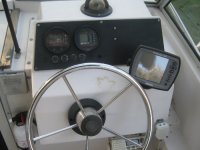
I took it out once for a few hours. It has about 30 gallons of 5 year old gas in it. Some how it runs well with this gas. I burned about half of it and need to take it out once more to empty it out. Seafoamed it while I was out also. Runs great, had no issues running around the West and South rivers.

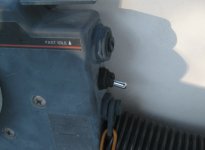
Did a general cleaning and tried to address any major issues before I button it up for the winter. Replaced the boots on all of the toggles to keep water out.

attachment.php


The dash switches were easy to replace because they are a standard 15/32 thread. The choke was a little trickier.

attachment.php


The Yamaha switch is a M12-1 thread. I replaced that boot with Part #335-1125-ND from Digi-Key.

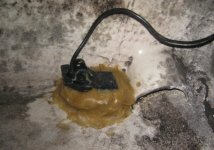
The PO seemed to love to use screws for countersunk holes where I would have used a regular sheetmetal screw.
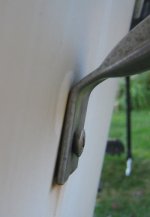
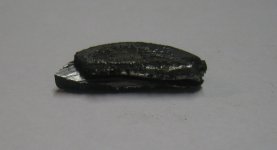
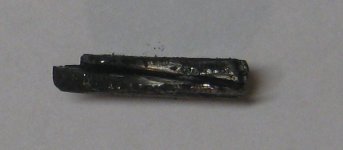
Rod holder:
attachment.php


More concerning the swim platform brace. Not sure how well that is sealing to keep water out of the transom.
attachment.php


Love the boat so far. Working on a PVC winter cover support. Bought one of the oval pool tarps, will hopefully see how it fits tomorrow.
 

Attachments

  • switches.JPG
    switches.JPG
    39.8 KB · Views: 117
  • choke.JPG
    choke.JPG
    38.5 KB · Views: 117
  • Holder_screw.JPG
    Holder_screw.JPG
    42.5 KB · Views: 117
  • Swim_screw.JPG
    Swim_screw.JPG
    42.8 KB · Views: 116
The boat didn't come with a depth/fish finder. I always like to know my depths so I picked this Garmin up off craigslist for $50.

attachment.php


The transom had some previous transducers and their associated holes. I need to spend some time cleaning them up and sealing them properly. I will probably install something a little more sophisticated than the Garmin 140 next year. I didn't want to Swiss cheese my transom any further so I put the transducer in the bilge with a bees wax toilet ring to shoot thru the hull. Depth works ok but the fishfinder isn't completely happy with it. So I know how deep it is but I probably won't see any fish on it the screen.

attachment.php
 

Attachments

  • depth.JPG
    depth.JPG
    58.6 KB · Views: 114
  • transducer.JPG
    transducer.JPG
    69.3 KB · Views: 116
This was the trickiest repair so far. I dropped the lower unit to check everything out and replace the impeller. The lower unit was stuck so I needed to use a couple putty knifes and wood wedges to get it to drop. The two locator pins were corroded into the housing. I was afraid the shaft was stuck. I had read horror stories about cutting the shaft to separate the two.

Everything else came apart ok but the impeller's woodruff key was pretty corroded and I was afraid it could spin inside the impeller. I ordered the key from boats.net and took it all apart again. The new (and old) are steel. I tried round punches, vise grips, and dikes to get it out. There wasn't much to work with because it was corroded and already rounded over. I took out the dremel with a fine cutoff disc. Split the key in two and it came out easily. The new key was pretty tight. Had to smack it in with a brass hammer.

attachment.php


attachment.php
 

Attachments

  • key1.JPG
    key1.JPG
    34.1 KB · Views: 116
  • key2.JPG
    key2.JPG
    36.3 KB · Views: 112
Love the boat so far. Working on a PVC winter cover support. Bought one of the oval pool tarps, will hopefully see how it fits tomorrow.

I too just bought an oval pool cover. But I built my winter frame using EMT conduit and kover klamps. A bit pricey compared to pvc, but should last the next decade. Will try to get some pics this weekend.
 
Sounds good Duck. Keep us posted. I hate previous owners who use blatantly wrong hardware and methods when doing it right wouldn't even cost them extra. The lexan wind sheild on my Carolina Skiff was put on with expandable sheet rock anchors.
 
I too just bought an oval pool cover. But I built my winter frame using EMT conduit and kover klamps. A bit pricey compared to pvc, but should last the next decade. Will try to get some pics this weekend.

Glad you guys are using the oval pool cover trick. Way cheaper and much stronger than the flimsy tarps they sell at Harbor Freight or Home Depot or Lowes.

I've used basically the same set up for over 5 years now and it works great. Used a Hicky to bend the 1 1/4" heavy wall pipe to a nice curve for up at the bow and over the windshield. For strength I cut 6" pieces of the next size down and inserted them at the joints... much stronger than using couplers and no projections to puncture the pool cover.

I don't recommend PVC because it gets brittle in sub-freezing weather. Add a few hundred pounds of wet snow on top of the cover and it will snap 2" PVC right at the joints like they are matchsticks. (Ask me how I know) Since I switched to metal pipe I've had zero problems with my boat cover.

Just remember that no matter how you cover your boat, MAKE SURE you leave all hatches and and the cabin door open. Otherwise moisture will collect under your deck and start rotting out your deck and stringers. Keep your boat well ventilated and you'll avoid a lot of trouble going forward.
 
An easy tarp support can be made of 2x4s in a "spine" from the top center of the windshield to the top of the motor...then a second 2x4 from just beside the first one on top of the windshield to the bow rail. A stiff leg under the bow rail will give it the support it needs. Padding in appropriate places: top of the motor, top of the windshield and where ever you feel it's needed. I've used this system for years and works well, w/easy tear down a big plus when time to splash...

If you don't like the idea of the top of the motor for support, an "A" frame from the transom should be easy enough to configure...

Reels comment reminded me of another trick someone recommended here a while back. Get a few "Pool Noodle" floats from the local dollar store. (The kind with the hole down the center) Make a cut lengthwise down the entire length and snap them over the top of your windshield to both protect your windshield and protect your tarp from the sharp corners that will tear your tarp under stress. Your boat & your tarp will thank you for the padding.
 
Reels comment reminded me of another trick someone recommended here a while back. Get a few "Pool Noodle" floats from the local dollar store. (The kind with the hole down the center) Make a cut lengthwise down the entire length and snap them over the top of your windshield to both protect your windshield and protect your tarp from the sharp corners that will tear your tarp under stress. Your boat & your tarp will thank you for the padding.

That's a good idea. I just put on 3/4" (I think) host insulation from Home Depot on the windshield. A swim noodle would probably work better.
 
That noodle is a good idea! I've been using a foot long piece of 3/4 in. heater hose split on each side of the windshield for years. It works well too.
 
That noodle is a good idea! I've been using a foot long piece of 3/4 in. heater hose split on each side of the windshield for years. It works well too.

I used some of the flexible downspout pipe for the same purpose w/good result...cut one slice lengthwise and fit it over the top edge, turning the corners at the side windows...
 
Back
Top