Wellcraft, V20 and Steplift remain the property of the Wellcraft Company
Install the app
How to install the app on iOS
Follow along with the video below to see how to install our site as a web app on your home screen.
Note: This feature may not be available in some browsers.
You are using an out of date browser. It may not display this or other websites correctly.
You should upgrade or use an alternative browser.
You should upgrade or use an alternative browser.
Transom rebuild V20 Jeanne Marie
- Thread starter billfish16
- Start date

billfish16
Junior Member
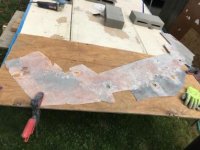
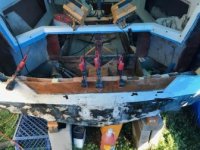
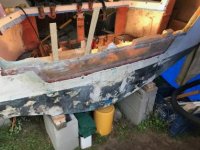
Poured the first of three 5 gal buckets of Seacast into the transom. I removed the inner skin to get all the wood out, then glassed it back prior to pouring.
Attachments
billfish16
Junior Member

billfish16
Junior Member
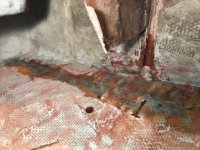
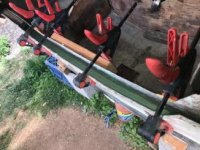
I am increasing the transom to 25”. I deliberately waited to raise it to give me better access to the lower portion of the transom for the 1st pour.
billfish16
Junior Member
I added the inner skin of the transom cutout yesterday. The plan today or tomorrow is to pour the second of 3 five gallon buckets of Seacast. FYI the spacers are not set and are not going in those locations.
Attachments
Last edited:
billfish16
Junior Member
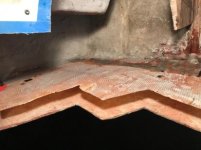
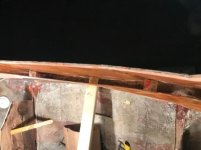
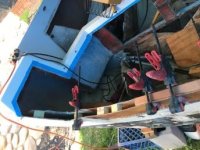
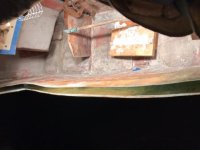
The second pour was delayed until last night. The before pic has most spacers visible. The other two photos were post pour.
Attachments

billfish16
Junior Member
The second pour was delayed until last night. The before pic has most spacers visible. The other two photos were post pour.
Short video post second pour.
https://youtu.be/v-Pqd6Ie1Qo
billfish16
Junior Member
While you have it opened up, don't forget to re-do your deck drains/hoses/scuppers.
I had a hard time finding original sizes. Ended up changing to new & bigger stainless scuppers
Thank you for the tip Skunkboat!
Nice work you will enjoy it for years to come, I did mine back in 2007/08 with Arjay pourable, I removed the outside skin and remove the rotten wood and pour, to this day not a single problem to report, not to mention I have an etec 135 HO pushing it with all that torque, no flexing.
jetblue319
Junior Member
it's looking good, i do have a question , you used a chainsaw to hollow out the rotten wood, did you go all the way to the edge?
billfish16
Junior Member
it's looking good, i do have a question , you used a chainsaw to hollow out the rotten wood, did you go all the way to the edge?
Yes, every piece of wood in the transom was removed. This was made easier because I removed the splash well and inner transom skin.

 Excellent work.