Huron Blue
Member
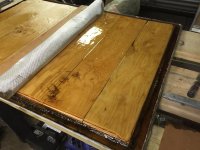
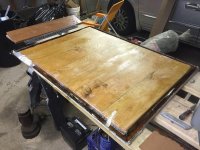
Thanks. Interesting the way the wood was all small pieces. I am thinking of doing 3" strips to allow the resin to form a line all the way up to what will be the cloth / glass bottom.A couple more tips these guys taught me when I did mine was,
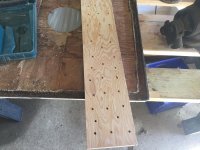
cut the holes out after everything is all said and done. And then coat the edges .
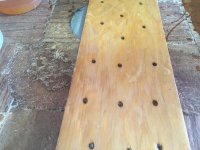
Drill some holes in the plywood to let the resin find a place to go instead off squeezing out the edges.
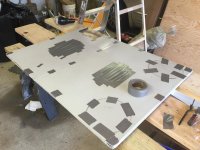
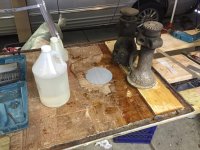
Put some Saran Wrap or some kind of plastic between the access holes and your work table so you don't glue your hatch to the work bench!
Oh and get lots of heavy things ready before hand to set on top of the ply., sand bags, tool boxes cinder blocks. And make sure your work table is perfectly flat, floor works well too
Last edited:

 I think one of the reasons it's best to do pieces is a sheet of plywood is naturally not perfectly flat. Doing it in pieces helps straighten that out and easier to judge and deal with the resin mixing when your not doing a lot at once. I had an issue once after only a few minutes my resin bucket got too hot to touch and it wasted about 1/2 a gallon! Guess I should have kept it on ice or something? But ever since then I've been a little gun shy of mixing a lot at once.