Transom?'s

71mako19

Member
Well, I towed the new V back on Sunday. Ill post pics and story soon. Anyway, poking around it looks like Ill need to do a transom. Also, the port stringer is separated from the transom and a bit of the bilge floor so that will be fixed as well. Real f'd up. Anyway, there is a curve to the transom over all, my question is how do you replace the plywood when there is a curve? Do I cut it in sections and laminate them to form the radius, or does straight plywood work? Also looking into the nidacore pourable transom but it seems like it would be easy enough to remove the top cap from the transom, chainsaw out the rotten wood, and drop in the new wood. I would like to avoid cutting up the entire floor. Ill obviously need to make some access to repair the stringer. Any help?

Steve
73 V center console
 
See Hammer's transom rebuild in the off topic section I believe.

I personally wouldn't do the chainsaw thing... I don't think you'll ever be able to get all the wood out therefore I don't think you'll get a good bond. If you don't want to cut the floor up you can do the job from the outside whereas Hammer is doing his from the inside.

P.S. I have never done a boat transom so take this with a grain of salt!
 
BLUE, is correct, it's impossible to get all that wood out of the transom. I'm redoing a 78 V20 cudy. This is my first transom job. Not hard at all. I'm doing all the work myself. The transom is curved. What I did was after making teh template, cut a few long knotches into the plywood. I only cut to the thickness of one ply.
Check out Hammers transom repair.
Post pics. of what ya got and the problem.
Where ya located ?
 
I checked out your transom post, looks good. A lot of work you did there. Im in MA. I just got done restoring a mako 19 and was trying to keep the repairs on this one under the radar, my wife will flip when she sees me cutting into another boat. I told her this one was "turn key". I know there is no way to hide a transom job, just want to make it look like no big deal;). Exploring the cheapest and best way to go about these fixes. After scoring the face, how hard was it to conform the plywood to the old radius?
 
Some people go with thinner wood, and use more sheets to make the bend easier to form. I know one of the members here used 3 sheets of 1/2" to redo his transom because the thinner wood forms easier.
 
Considering I need to repair at least part of a stringer it will probably be best to remove the rear portion of the floor along with the inner transom skin. Man that sucks....
 
Like I said, I did all the work myself. I used twp pieces of 3/4, cut a few slices down her, and she fit right in. Clamped her down and had her sit for a day.
How much did you pay for your V ?

P.S. I cant see any of the Pics. you posted. >:( >:( >:(
You are gonna post Pics....right. >:( ;D ;D :P
 
71mako19 said:
Considering I need to repair at least part of a stringer it will probably be best to remove the rear portion of the floor along with the inner transom skin. Man that sucks....
Removing the inner skin is not very hard and it allows you to do several thing without tearing up the fiberglass.
1 You can replace the transom form the inside
2 You have access to the florring without cutting up th boat
3 You can check out all the stringers and other stuff under the flooring

We took out my inner skin in just a day and that involved removing the engine, center console, removing rub rail and screws under the RR and loosing upp any hoses or wires which need attached to the inner skin. If you want more info let me know.
 
Still running- did you need to take any precautions in making sure the overall hull shape did not change? Ive seen a few mako and seacraft restores that deformed when the top cap was removed and it was next to impossible to get the cap to re mate with the hull. I dont know much about wellcrafts and maybe there is enough rigidity in there to keep it straight. That is my only reservation about pulling the cap, aside from coming up with a contraption to pull it off. That may be the best way to avoid unsightly cuts and get full access...

On another note Im real curious about the nida core pourable transom. Im gonna call them and pick their brains. Im gonna pull the top cap off the transom this weekend and see how rotten it is. If it is oatmeal and I think I can get most of it up through the top then Ill seriously consider pouring it.
 
That Nida Core looks nice,
I checked their website and read all the data.

I wonder how much would be needed for
a V transom?
 
Not sure. I think you get 1255 cubic inches per 5 gallon pail. Ill try to do the math this weekend. Probably at least 10 gallons.
 
Hey 71maco, Ive gotta 77 V cutty I/O and replaced the transom on it last year. I removed the engine, inner transom plate and gimble completely.I removed both saddle tanks and any wiring in the way. I then cut the inside skin off the transom, and cut out about 10-12 in.off the floor under the transom cap that wouldnt be seen when repaired. I ground ALL the wood and hand laid glass out clean to the inside of the outer skin. I washed it all down with asetone, and laid layers and layers of resin and glass back in, making it totaly flat across the inside. The transom was made of three pieces of 3\4in plywood, so I bought 2 sheets of marine grade ply (86.00 a piece) , cut 3 templates. I cut the plywood and glassed it back in using all the existing screw holes in the transom to put ss screws through a 1in block of scrap wood to pull the wood up tight to the outer skin. I used 8 clamps in the outdrive hole. After it set i cut and applied another piece of ply to the center to give me 2inches total thickness for the gimble. I glassed it all in really good and gelcoated it over. Try ad avoid all air pockets and bubbles . Its messy but not that hard . Its solid as a rock. If it lasts 30 years again I wont have to worry about it!  Oh forgot to tell ya to make sure if ya have a I/O to glass the inside of the outdrive hole , Thats why mine rotted in the first place! It took about 10 gallons of resin and a pile of mat!
 
Re: Transom?'s  (long)

Guys,

I have to admit that I've been looking into transom repair techniques other that the traditional glass/wood layup process. I've been communicating to a few folks on the Mako board (sorry :-[) . I've looked at Seacast, Arjay and Nicacore. I've spoken to people at all three manufacturers as well as at Wellcraft and Venture marine (both use the Arjay 6011 pourable ceramic in their transoms. Here's a post I made on the Mako board:

I spoke to the guys at Arjay yesterday. Very helpful. They are sending me a bonded piece of their material to check out. Being a civil engineer, I've researched this pourable stuff significantly. I've loooked at three products: Seacast, Arjay 6011 and Nicacore's Nidabond pourable transom product. Allare poly resins with possible add mixtures. Seacast uses chopped fiberglass where the other two use ceramic spheres. I've got to think the fiverglass strands will provide superior tensile strength that the spheres, and that is backed up by the Seacast strength tests (for what they are worth). Wellcraft ahd Venture marine both use the Arjay in their transoms and have been for some time. I found Arjay for $95/5 gallon (quoted) at Fiberglass Services in Sarasota. Nidabond is about $115 and Seacast is running over $200 for the same size bucket (ouch).

I completely agree with Raybo that the pourable material has its applications but not across the board. If your stringers are bad you need to go full replacement with the traditional method (I would use coosa, but that's just me). With this method, you've got to cut the hull or inner liner at some point - just no way around it.

In my case, I have a very clean Wellcraft that I don't want to cut the cap on (I will never go in through the hull; again, that's just me and my skill level). I also agree with Raybo that if you use a pourable, the void space MUST be clean, freshly sanded and with a coat of new glass or resin applied. Harbor freight has affordable drill bits (about 2 ft long) for getting the wood out and they have a cheap drum/disk sander pack that fits on a drill. The sizes range up to about 3 inches. The smaller ones are perfect for sanding in between the hull and liner. While I see the dangers of going the chainsaw route, I have a small electric that I would use IF the wood is very soft and easily removed. I'll definately document the process when I begin.

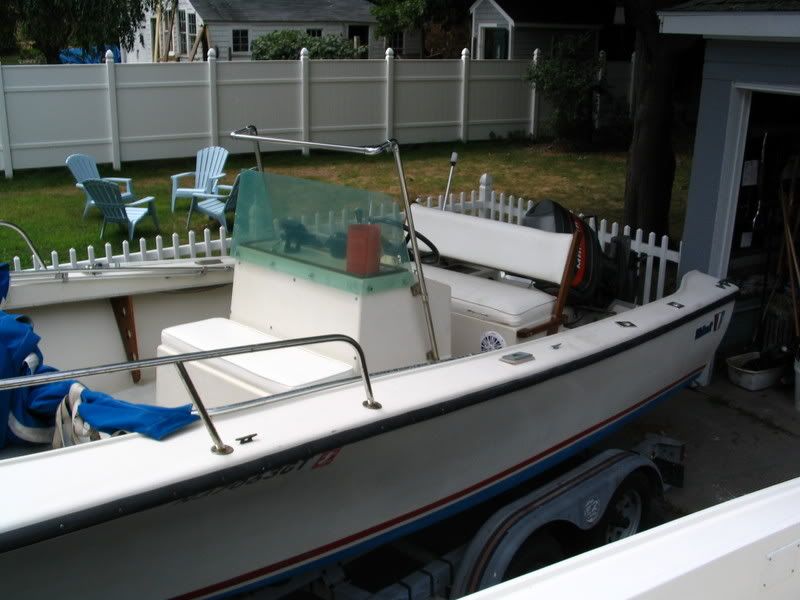
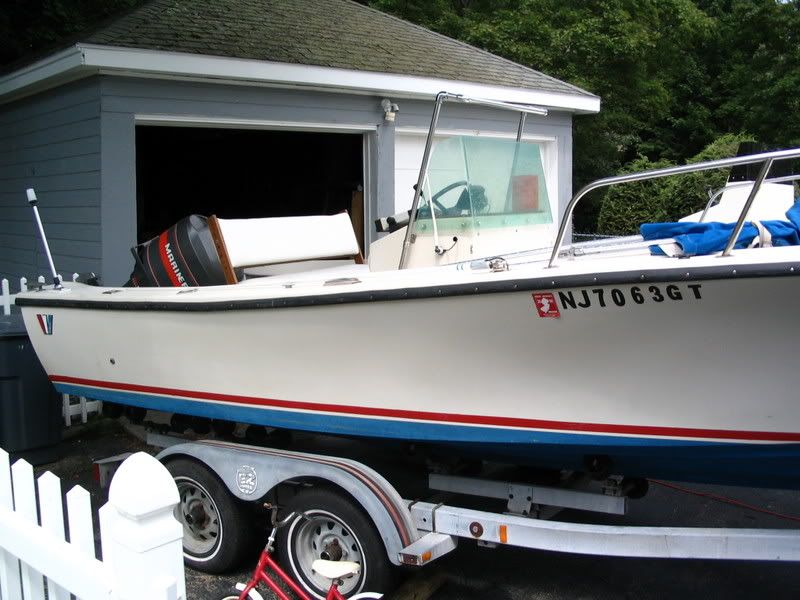
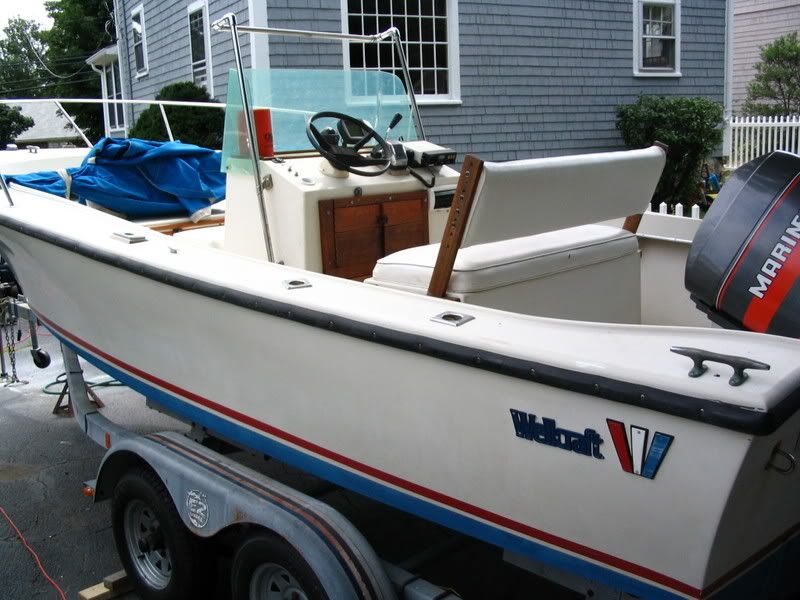
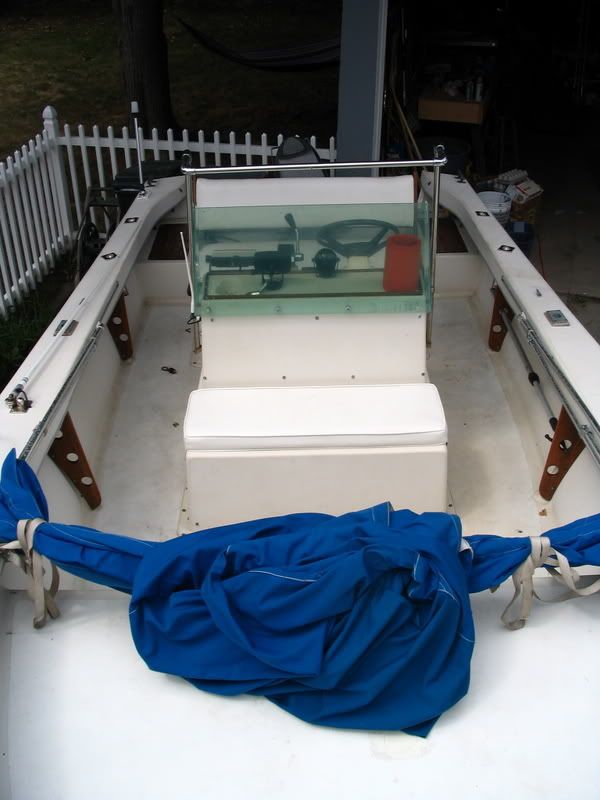
As I say in that post, My dually is pristine up top (not to the Lumber's level yet!) and I really don't want to cut the top cap. I could remove the entire cap but I don't have the facilities for that. I'm of the opinioin that IF you can get ALL the wood out - no matter how long that takes- and you can get a fresh coat of glass/resin in the transom to promote a good bond, the pourable's are a good alternative. I'm leaning to the Arjay 6011 at this point. My transom has a little flex, but its not terrible. This may be a winter project for me.

Hope this helps, Maury
 
I think Im gonna try the pourable. I pulled up part of the top cap and the transonm is rotten, I can pull it out with just my hands. I grabbed out about 3" down, like cereal!

Here are some picks of the boat:

IMG_2284.jpg


IMG_2283.jpg


IMG_2282.jpg


IMG_2281.jpg
 
71mako19 said:
Still running- did you need to take any precautions in making sure the overall hull shape did not change? Ive seen a few mako and seacraft restores that deformed when the top cap was removed and it was next to impossible to get the cap to re mate with the hull. I dont know much about wellcrafts and maybe there is enough  rigidity in there to keep it straight. That is my only reservation about pulling the cap, aside from coming up with a contraption to pull it off. That may be the best way to avoid unsightly cuts and get full access...

On another note Im real curious about the nida core pourable transom. Im gonna call them and pick their brains. Im gonna pull the top cap off the transom this weekend and see how rotten it is. If it is oatmeal and I think I can get most of it up through the top then Ill seriously consider pouring it.
I looked at you pics and I think yours is older than mine which is a 1983. I had no problems at all keeping the hulls shape. My inner skin came off by taking off the rube rail and removing all the screws which held the inner and outer skins together. Of course we had to remove the seat, CC and the motor. After everything was removed it lifted right out with a pully system we rigged in a tree. the entire floor, inner sides etc.. just popped right out. We fixed the transom and lowered it back in and we were good to go.
 
HAMMER, I think you may have posted it somewhere else,
but if you had not gotten any freebees,
how much would you have into the transom you are doing??

The reason I am asking, it would be great to see a side by side comparison of
costs for different transom repair materials.
 
Back
Top