Robalo full transom

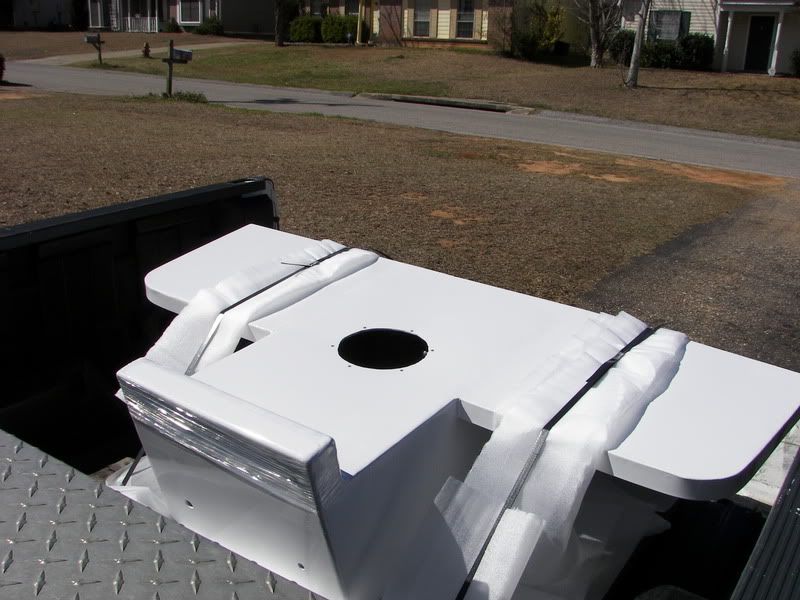
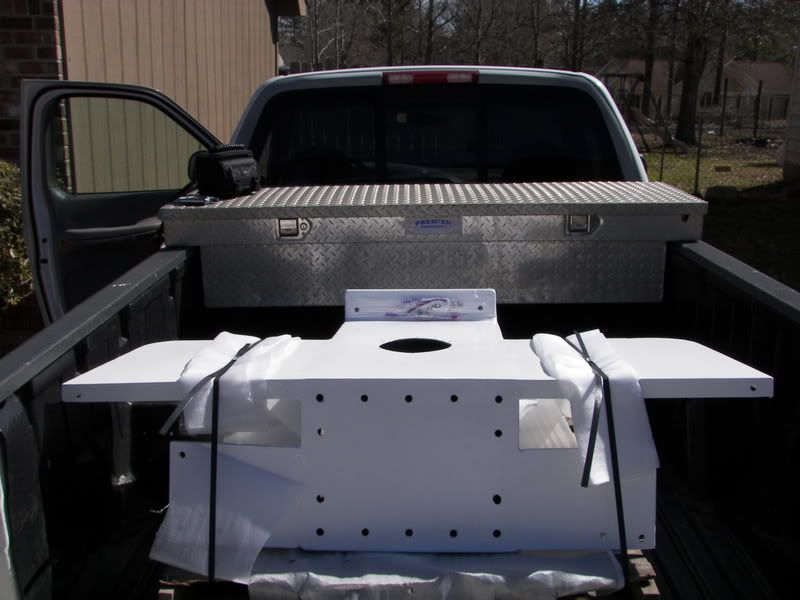
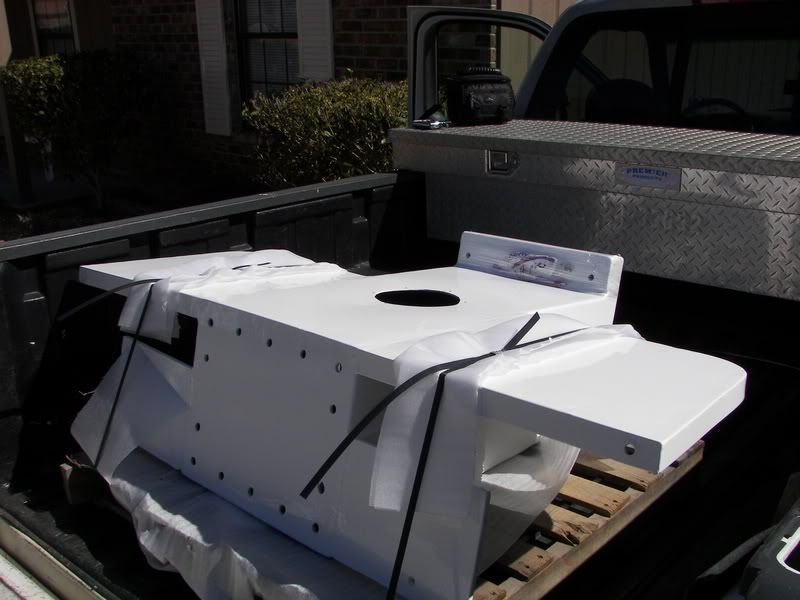
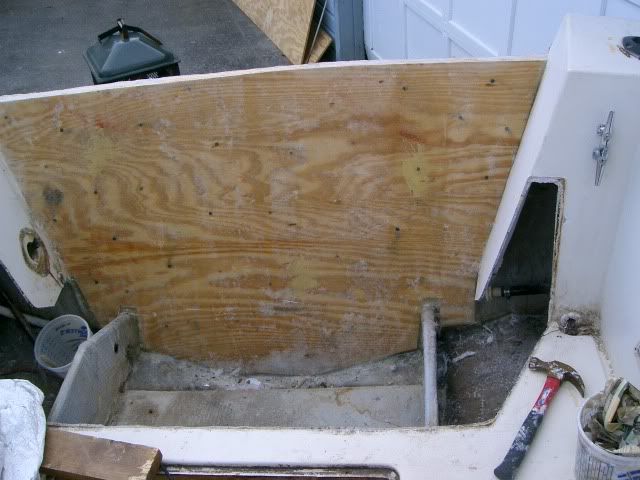
Well guys the buddy that bought my stainless outboard bracket when I opted out of my V20 project was ready to get started this weekend so we did. He has an older, but pretty nice 22' Robalo cuddy that we are hoping to do some tuner fishing in this year. Having been in it last year in pretty rough stuff I am excited to see how well it preforms with this addition. It already has a hellishly deep V in it and will bust up the sloppy stuff extremely well for a boat it's size. 8)


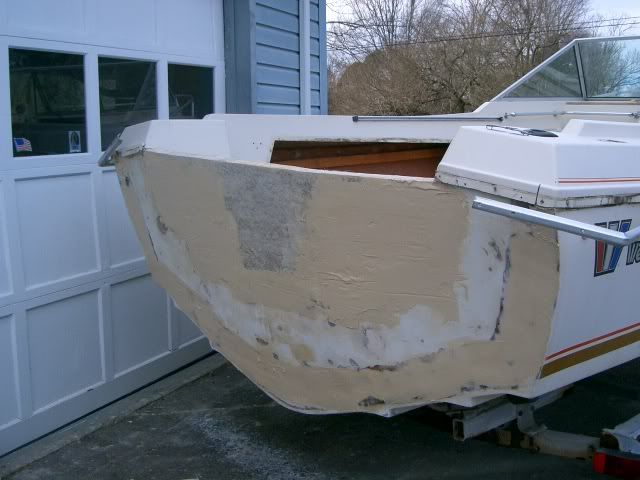
We got going on it and started closing up the notch and building the top cap for the rear as well. I walked him along and let him do most of the work since I had allot of stuff to do on my own boat as well. He much preferred it this way as he is very eager to learn.

We got it closed in and sealed. The glassing will start this week or this weekend.

Sorry for the pic quality, this is just my phone, didn't have the good camera with me.


Photo_021707_001.jpg


Here is the after shot:


Photo_021807_006.jpg


The bracket is getting its new powder coating as we speak. I expect to have it back sometime this week. Ill post pics of it when I get it. 8)
 
bRe: Robalo full transom

The guy who is doing my transom refused to just fill in the area where the notch was due to the fact that my bracket would bolt up between the notch and a new section. If the bracket would have bolted up on the factory transom he would have just fill it in. As it turned out he found my transom was in worse shape than we thought. Now I can rest assured that my transom is in good shape, and actually stronger where the bracket will bolt up due to an extra layer of plywood in that area. :)
Wellcraft2207001.jpg

Wellcraft2207005.jpg
 
I agree with your guy. I would have done the same thing.

This one bolts up all under the notch...the small "starter" holes are already there, you just cant see em in the pic. ;)
 
Hey 2ndchance, did your glass guy maintain the curve of the transom or is it straight now? I've been staring at your picks and I still can't tell.
 
Never liked that curve in the transom, No reason that I know of why they did it like that. Makes looking for a full bracket hard to find.
 
Looks like it has a bow to it?? Might be just me? But straight it fine also!!

Hammer I have a straight bracket on a curved transom, nothing a couple of shims won't fix.
 
The bow is still there. The way he did it was to remove the outer skin. The inside glass was left in place and the new wood epoxied and screwed in place therefor it maintained the original shape.
 
The bow in the transom is for strength,
it is the same principal as a dam on a river.

Even though you may see some that look straight,
the dam is always bowed up stream.

We do the same with car and truck chassis,
they are built with a bow up from the ground and then
when all the remaining components are mounted,
the vehicle ends up level to the ground.
 
Got the bracket back from powder coating. We will continue work on the transom this weekend. I kinda want it back now that Ive seen how good it looks! ;D


bracket012.jpg


bracket013.jpg


bracket014.jpg
 
Looks just like mine now!! They did great job!! Did they blast all the old off before the new or did they just clean and repower over the old?
 
They put the antifoul on as a primer???

before the powder coat???

That goes against everything I know about powder paint.
Powder needs a good solid clean metal finish.

Isn't antifoul designed to shed?
 
Not antifoul paint, antifoul PRIMER.

He said it helps the paint to better stick. The primer adheres to the stainless better.


I hadnt heard of it before either, but he builds custom race car frames and such and garanteed me that before the paint chips the stainless would bend. :o


I let it slide around in the truck on the way home ( I swerved quite a bit back and forth too) and beat it all against the tool box to test it. When I got it home the tool box was dented, but no scratch on the powder coating. ;D
 
Back
Top