Request for RidgeRunner

billymoca

Member
Ridge,

I am rebuilding/customizing a 1980 V20 CC, and I REALLY like the way that your transom and bracket detail turned out, as well as the console. Excellent Job.

Several Questions:

Did your boat start as a I/O?

Did you keep the factory console and modify it? or did you purchase new?

The album that you have posted only shows the outside of the boat, and I was hoping to see how the inside of the boat turned out after you were done.

Do you mind showing me two or three pictures of the inside of the boat when you have time? I would really appreciate it.

Thanks in advance.

Bill
 
Thanks for the compliments Bill,
The hull started life as a Outboard, transom cut down to 25" with the splash well built into the liner. The console is a modified version of the original. I can get pictures of the inside. The core was rotten in the liner and 90% was replaced during the cap-off rebuild. I decided to make it a full transom boat. Once the hull was changed at the transom I had to make the liner match the hull. The grinding alone was daunting.
I had several cameras stolen during the rebuild so very few pictures. I have a 35mm picture of the liner flipped upside down on a jig I made. All of the core in the floor had been removed.
Factory console, I shaved the rod holders and seat off, extended the base down 4" (making the console taller) and added a mounting flange on the inside, cored the sides of the console and then added the top piece to flush mount the electronics. When all was said and done I made a starboard cabinet and face to fit underneath and a faceplate with three access doors to finish it off. A might heavy and too-tall but very custom, LOL.
 
Thanks, That is horrible to hear about the stolen cameras. who ever did that should have his family ***els rearranged. I have had lots of tools stolen too.

I have truly been enjoying the past threads from everyone on this site
and have gained much knowledge from you all. Now to turn that into wisdom.

My boat is very factory and has been sitting for the last ten years in a cow pasture. The transom is rotted, but the floor and the stringers are in ok shape. I want to change the storage compartments, move the console forward and close off the transom with a new custom aluminum bracket so I figured that I will be doing a cap off build as well.

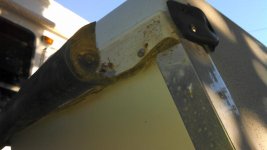
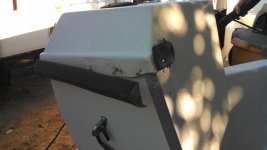
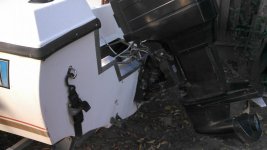
these pictures are from Day One:

I am trying to figure out how to continue this edge detail one I close off the transom and then what do I do to the inside of the boat at the transom. I have 4 kids, so I would love to have more storage and possibly a seat, but I am worried about how thick to make the back transom area.

So here are a few more questions: did you remove the fiberglass on the outboard edge of the transom, or just fill in the recess. I am hoping to simply insert the new transom from the inside of the boat.

Does the boat have to stay a two piece boat? What if when I was done, I glassed the boat together and removed the rub rail?

What should I use for transom material? I have heard a lot of people say two layers of 3/4 ply is sufficient, I was thinking of two layers of ply plus a 3/8 layer of aluminum sheet sandwiched and glued (5200?) into the transom for extra rigidity.
 

Attachments

  • IMG_20121103_164611_823.jpg
    IMG_20121103_164611_823.jpg
    29.8 KB · Views: 21
  • IMG_20121103_164559_265.jpg
    IMG_20121103_164559_265.jpg
    33.1 KB · Views: 20
  • IMG_20121103_161909_454.jpg
    IMG_20121103_161909_454.jpg
    37.7 KB · Views: 21
Thanks, That is horrible to hear about the stolen cameras. who ever did that should have his family ***els rearranged. I have had lots of tools stolen too.

I have truly been enjoying the past threads from everyone on this site
and have gained much knowledge from you all. Now to turn that into wisdom.

My boat is very factory and has been sitting for the last ten years in a cow pasture. The transom is rotted, but the floor and the stringers are in ok shape. I want to change the storage compartments, move the console forward and close off the transom with a new custom aluminum bracket so I figured that I will be doing a cap off build as well.

these pictures are from Day One:

I am trying to figure out how to continue this edge detail one I close off the transom and then what do I do to the inside of the boat at the transom. I have 4 kids, so I would love to have more storage and possibly a seat, but I am worried about how thick to make the back transom area.

So here are a few more questions: did you remove the fiberglass on the outboard edge of the transom, or just fill in the recess. I am hoping to simply insert the new transom from the inside of the boat. I split the liner and hull and did 90% of the work to the transom from inside the boat. Made a couple of crude molds with plywood/formica and clay to form the shapes and angles on the liner, hull and console.

Does the boat have to stay a two piece boat? No What if when I was done, I glassed the boat together and removed the rub rail? You could glass it but that is a ton of extra work. I think JasonCooperCola on here was going to do the same. Check out KrackerJack threads too. The rub rail is something I need and want but there are a bunch on here that have removed the aluminum angle off the top of the transom and glassed the transom and cap together making it smooth and one piece. In doing so they have lessened the chance of water intrusion/rot at the top of the transom.
What should I use for transom material? Wood and fiberglass. I have heard a lot of people say two layers of 3/4 ply is sufficient, I like the 2 layers of 3/4" so that is how I went. I was thinking of two layers of ply plus a 3/8 layer of aluminum sheet sandwiched and glued (5200?) into the transom for extra rigidity.
I have heard some of the speedboat manufacturers using aluminum and wood hybrid transoms with good success. I think it is overkill on a V-20. (Allison uses aluminum and so does Summerford IIRC) Besides, my V-20 transom was anything but flat from side to side so making the 3/8 aluminum conform would be an issue. Maybe just down the middle. I made the transom more ridgid by adding knee braces, fiberglassed to the existing stringers extending forward to the first bulkhead and extending up the transom 28 to 30". Might be overkill but it certainly has proved itself.
 
Ridge,

Thank you very much. I really appreciate the information.

I have been following Kracker;s build for a while, not sure how i missed Jason's....that is some very helpful information!

Well, here goes nothing! I will post pics as I go - probably under a different thread.
 
In addition to all the screws the cap was glued/caulked to prevent water intrusion at the joint, then the floor of the liner was bonded to the stringers and transom with bonding putty. If you stick your head down in the storage compartment on the front deck you can see the bulkhead and how the putty was done. To remove the liner I used a couple forklifts. Made a few wedges to tap in between the liner and the top of the stringers. Access was limited so I went through the front hatch opening and the fuel tank hatch opening. Cut some short 2x4 to fit through the openings and tied the rope to the 2x4 so it was pulling up on the bottom side of the liner.
 
Billy, I found mine in a cow pasture also. The cows used it as a scratch post!!! They almost pushed it off the trailer.
There's one word that will help you more than anything and that is research,research reasearch. When I first came to this forum I knew nothing about restoring a boat(well maybe alittle). The internet is full of knowledge. And this forum is awesome!!!!
Good luck on your build and we are all here to help.
 
transom on these boats are curved, so using alum is going to be difficult. I just did the two 3/4 ply and it was always solid. like RR i used knee boards on the stringers to transom. Also get rid of the cap on the transom!! Why wellcraft did that i have no ideas, but i am sure it the cause of most transom rot!

good luck
 
Billy in my thread, Cap is off, under general section there are pics of the three piece transom. I thought it was odd that three separate pieces were used. But it is easier to install that way.
 
Oh one more question.... was your cap glued to the stringers? or was it only held by the screws?

Billy check our Classic Seacraft forum...there are several full transom remods there...Having spent some time on Ridge's beautiful CC, I can tell you it's as purdy up close as it looks in the pics...so many subtle changes to mention and crafted w/a great deal of attention to detail, fit & finish...you chose a good model for inspiration...
 
Billy, I found mine in a cow pasture also. The cows used it as a scratch post!!! They almost pushed it off the trailer.
There's one word that will help you more than anything and that is research,research reasearch. When I first came to this forum I knew nothing about restoring a boat(well maybe alittle). The internet is full of knowledge. And this forum is awesome!!!!
Good luck on your build and we are all here to help.

Thanks...I really appreciate the help. reading the threads of all the rebuilds on here, it made the decision to rebuild this boat pretty easy.
 
In addition to all the screws the cap was glued/caulked to prevent water intrusion at the joint, then the floor of the liner was bonded to the stringers and transom with bonding putty. If you stick your head down in the storage compartment on the front deck you can see the bulkhead and how the putty was done. To remove the liner I used a couple forklifts. Made a few wedges to tap in between the liner and the top of the stringers. Access was limited so I went through the front hatch opening and the fuel tank hatch opening. Cut some short 2x4 to fit through the openings and tied the rope to the 2x4 so it was pulling up on the bottom side of the liner.

Sweet...

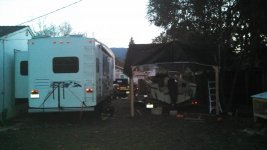
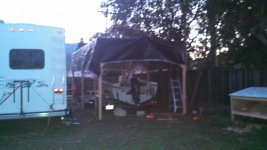
I built a temporary structure in the backyard to be able to lift the cap and eventually the boat off the trailer to re-gelcoat the bottom. I should be able to do the same thing this way.
 

Attachments

  • IMG_20130113_172926_260.jpg
    IMG_20130113_172926_260.jpg
    51.5 KB · Views: 4
  • IMG_20130113_173015_304.jpg
    IMG_20130113_173015_304.jpg
    41.9 KB · Views: 4
  • IMG_20130113_173027_069.jpg
    IMG_20130113_173027_069.jpg
    42.7 KB · Views: 4
transom on these boats are curved, so using alum is going to be difficult. I just did the two 3/4 ply and it was always solid. like RR i used knee boards on the stringers to transom. Also get rid of the cap on the transom!! Why wellcraft did that i have no ideas, but i am sure it the cause of most transom rot!

good luck


I agree that cap will be the first to go.

Did you do your knee boards out of plywood or metal? I was thinking i would run the knee boards out of metal, through bolted at the stringer, then through bolted at the transom using the same bolts that hold the bracket on to the transom. I have a welding shop who is going to make me a custom bracket so we can put our bolts anywhere we want.
 
Billy in my thread, Cap is off, under general section there are pics of the three piece transom. I thought it was odd that three separate pieces were used. But it is easier to install that way.

OK>>>> I was wondering about that...... why the hell would they use three pieces for the transom. wouldn't that cause the transom to flex at the joints? I understand for ease of the install to match the curve...
 
Back
Top