Airslot
God
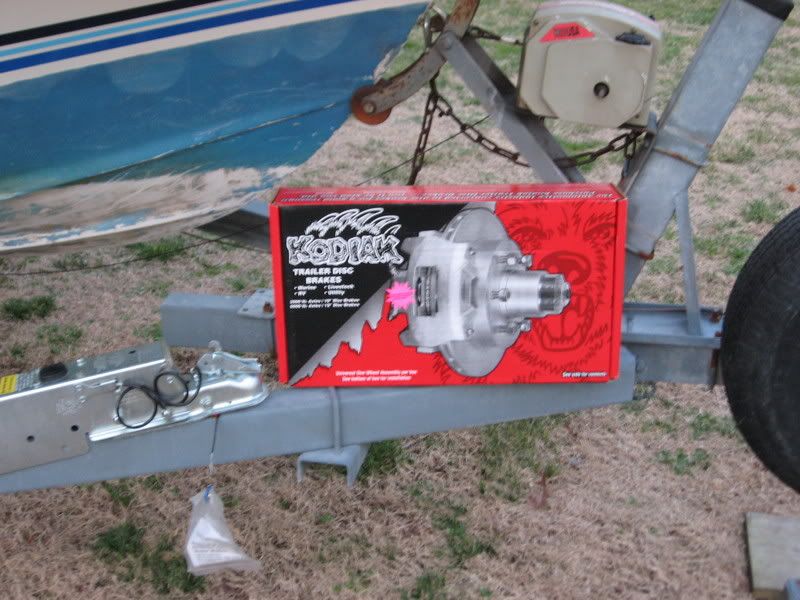
This thread will document swapping out my drum brakes and actuator for new Kodiak disc brakes and a Tiedown 70E actuator with built in reversing solenoid. The weather is forecast to be cold and I'm really busy at work, so this is going to take a few days. I'll be adding pics and dialogue as I progress through the project. Last night was the first step, receipt of the goods.
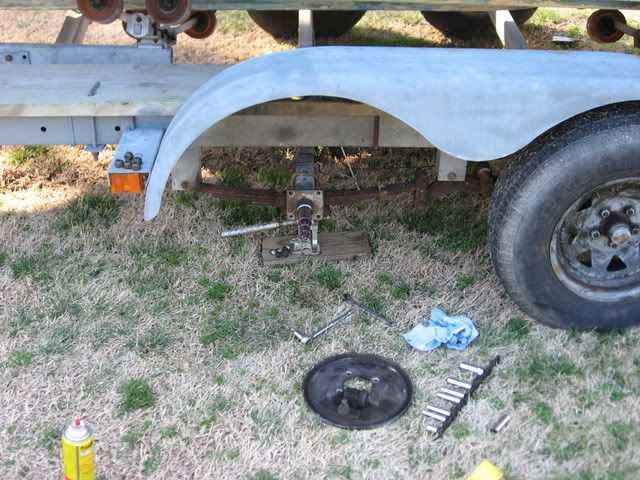
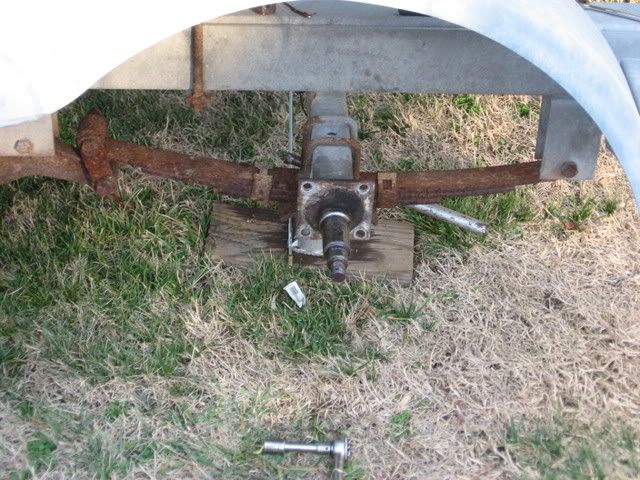
On the first side, I had already started disassembly as part of diagnosing my original problem. I had the boat jacked up and the wheel tire removed already. Any fasteners to be removed were “pre-soaked” in PB Blaster. Step one started like this:
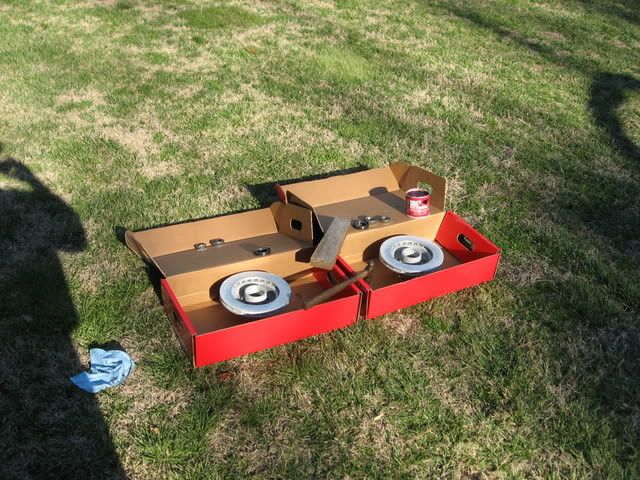
There aren’t many parts in disk brakes. The hub / rotor are one piece, then there is the caliper and caliper mounting bracket. That’s about it. These brakes come with new bearings and the races are already pressed in. The hammer and block of wood shown were used to press in the rear seals.
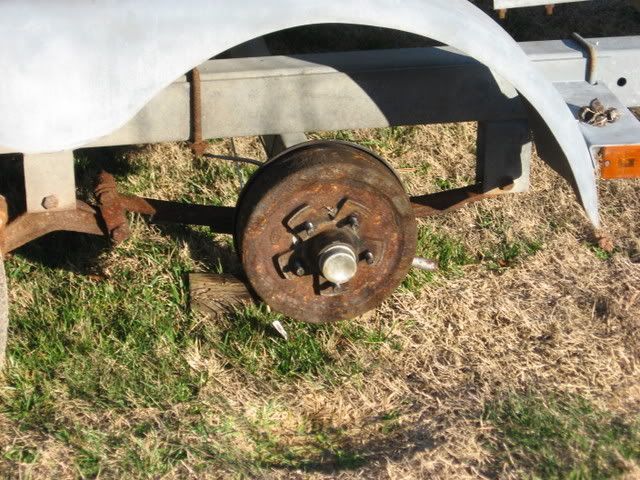
The entire drum brake assembly is removed by removing the 4 bolts that go through the brake mounting flange on the axle. After the flange was cleaned up with a wire brush, the new caliper mounting bracket is bolted on.
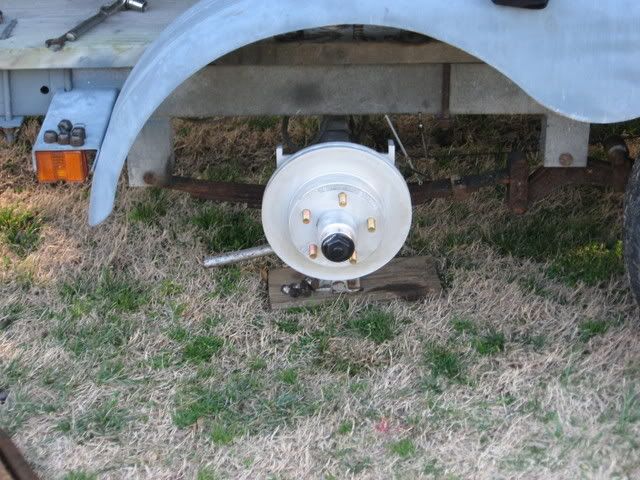
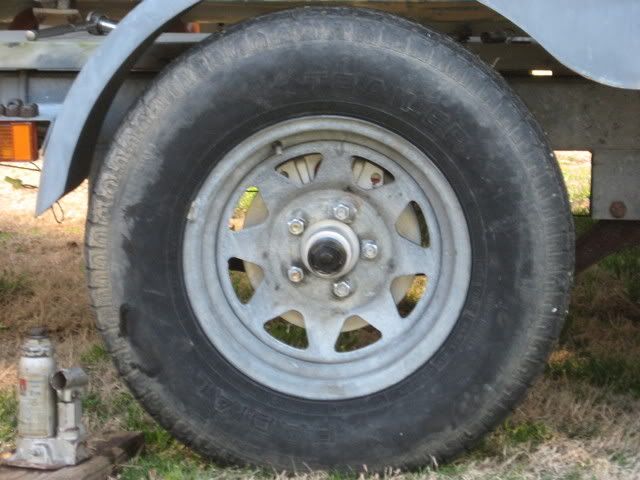
The next step is to install the hub / rotor assembly and the outer bearing.
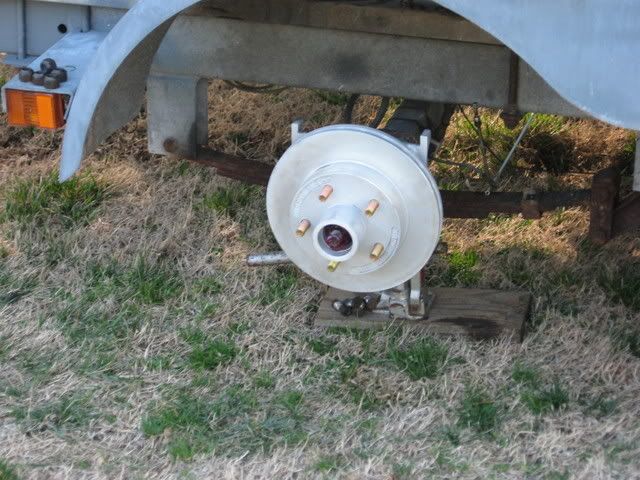
Now I installed the provided dust cover. Kodiak supplies a nice piece that can be used with grease or oil bath.
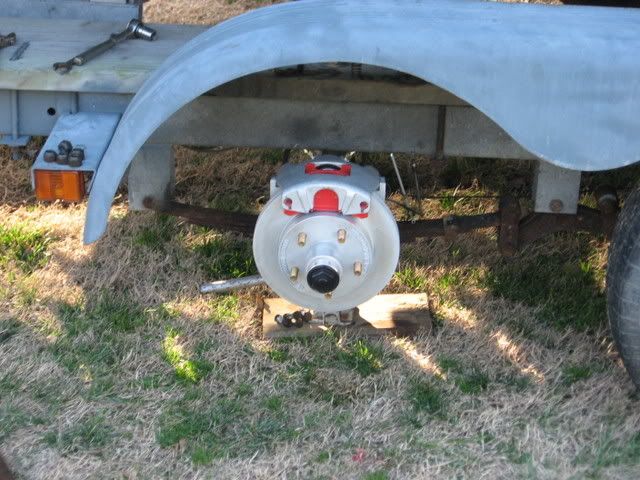
Nearing the end of side one, the caliper is mounted with two bolts, which are the “caliper slides.” I gave these a light coating of high temp grease.
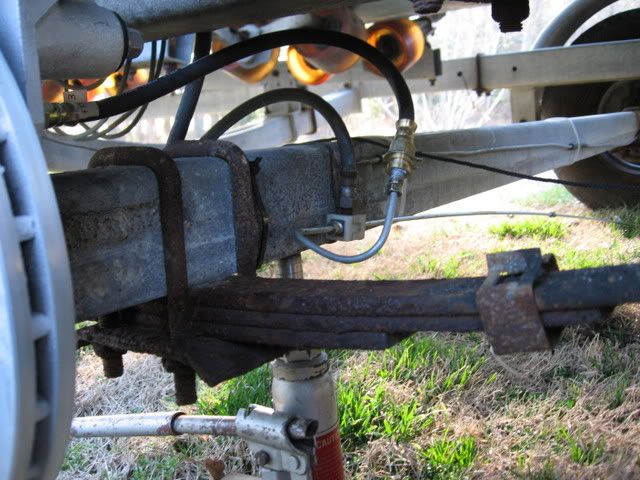
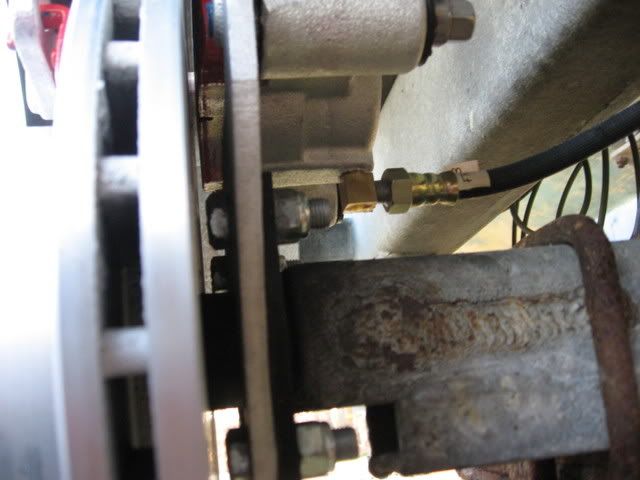
The next two photos show the brake line modifications. The drum brakes had hard lines running to them. Because the calipers slide, they had to use flex hoses. Thanks go to Gibbons Auto Parts in Pocomoke, MD. When I went to the counter and told them what I was trying do, they got me setup with what I needed. Try that at your big box store...
Side one is complete now.
Side two is much of a duplicate process. I used “never-seize” on all hardware possible and grease most everywhere else.
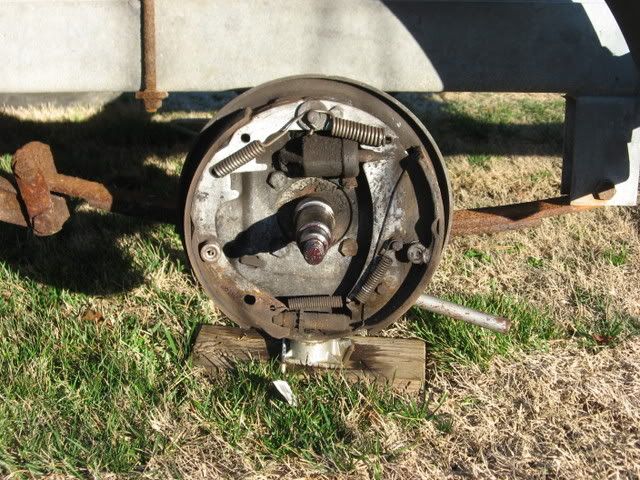
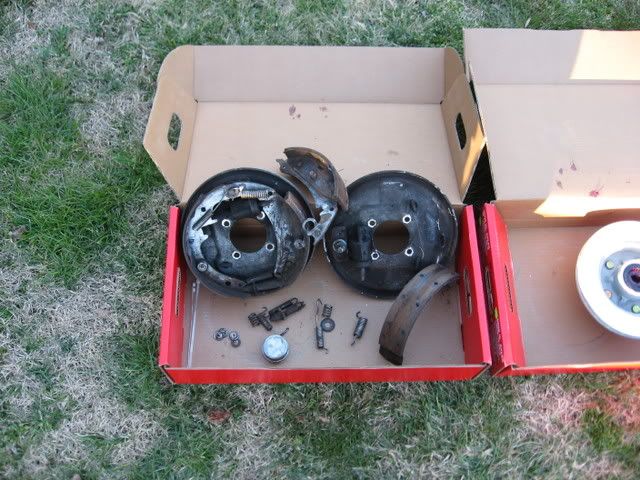
Drum brakes have a lot of parts compared to the three components of the disks.
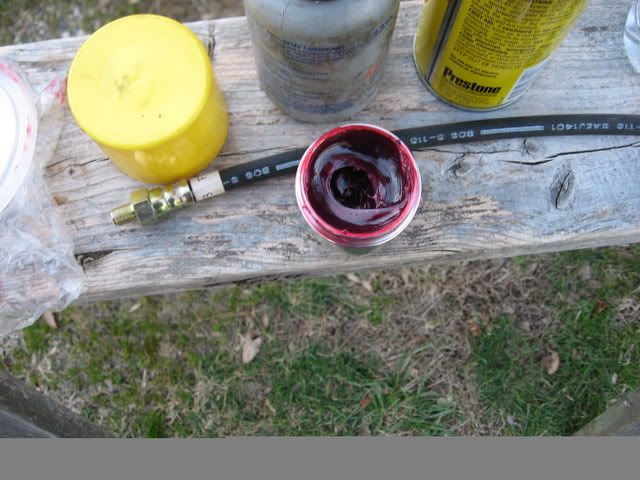
This pic shows a dust cover preloaded with grease and ready to be installed.
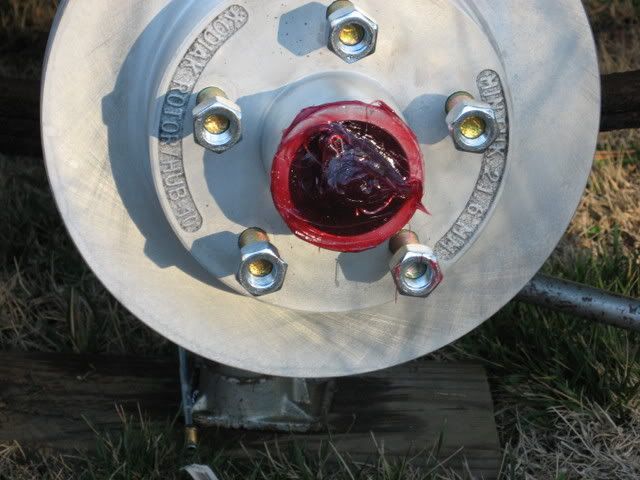
The next pic is of the hub / rotor installed and packed with grease. When I pack my hubs there is no air void left. I don’t use “bearing buddies.” I feel that as long as my grease doesn’t get out, no water is getting in.
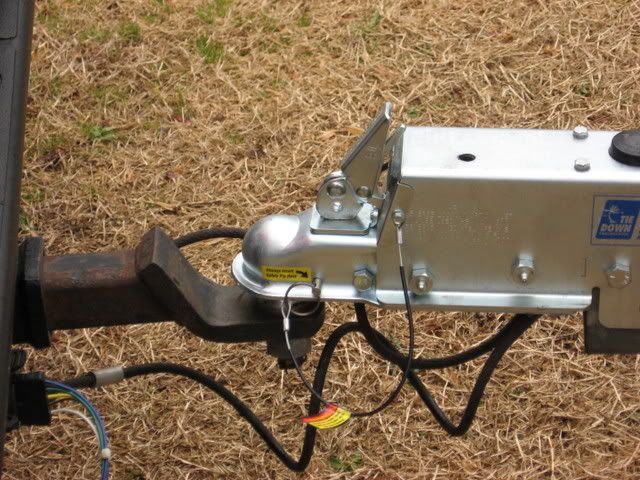
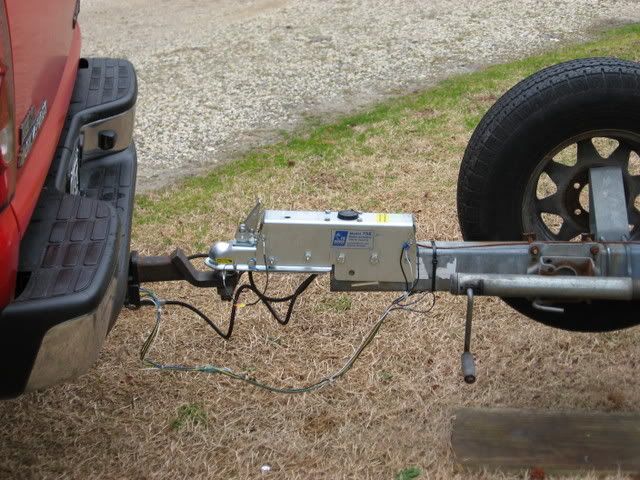
The TieDown Engineering Model 70 actuator is a nice piece. Most agree that their brakes suck, but they make a nice coupler. Note the safety pin right behind the ball. When the pin is inserted the coupler can’t come off the ball, even if it comes unlatched up top. This model also has s built in reverse solenoid.
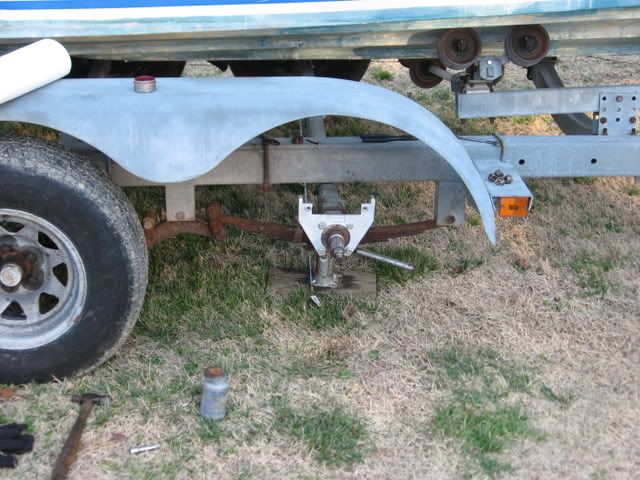
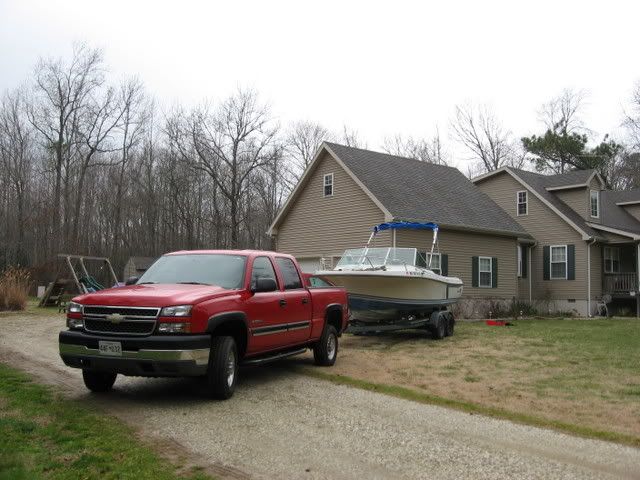
And this project is complete. It was a gray and rainy morning, but we got the job done. I’m home from a 40 mile test ride in one piece, and I managed to fill the boat up with gas while I was out, so add another $75 to the project total.
Airslot, out
On the first side, I had already started disassembly as part of diagnosing my original problem. I had the boat jacked up and the wheel tire removed already. Any fasteners to be removed were “pre-soaked” in PB Blaster. Step one started like this:
There aren’t many parts in disk brakes. The hub / rotor are one piece, then there is the caliper and caliper mounting bracket. That’s about it. These brakes come with new bearings and the races are already pressed in. The hammer and block of wood shown were used to press in the rear seals.
The entire drum brake assembly is removed by removing the 4 bolts that go through the brake mounting flange on the axle. After the flange was cleaned up with a wire brush, the new caliper mounting bracket is bolted on.
The next step is to install the hub / rotor assembly and the outer bearing.
Now I installed the provided dust cover. Kodiak supplies a nice piece that can be used with grease or oil bath.
Nearing the end of side one, the caliper is mounted with two bolts, which are the “caliper slides.” I gave these a light coating of high temp grease.
The next two photos show the brake line modifications. The drum brakes had hard lines running to them. Because the calipers slide, they had to use flex hoses. Thanks go to Gibbons Auto Parts in Pocomoke, MD. When I went to the counter and told them what I was trying do, they got me setup with what I needed. Try that at your big box store...
Side one is complete now.
Side two is much of a duplicate process. I used “never-seize” on all hardware possible and grease most everywhere else.
Drum brakes have a lot of parts compared to the three components of the disks.
This pic shows a dust cover preloaded with grease and ready to be installed.
The next pic is of the hub / rotor installed and packed with grease. When I pack my hubs there is no air void left. I don’t use “bearing buddies.” I feel that as long as my grease doesn’t get out, no water is getting in.
The TieDown Engineering Model 70 actuator is a nice piece. Most agree that their brakes suck, but they make a nice coupler. Note the safety pin right behind the ball. When the pin is inserted the coupler can’t come off the ball, even if it comes unlatched up top. This model also has s built in reverse solenoid.
And this project is complete. It was a gray and rainy morning, but we got the job done. I’m home from a 40 mile test ride in one piece, and I managed to fill the boat up with gas while I was out, so add another $75 to the project total.
Airslot, out


")
")
 ...leavin' my "V" in the emergency lane and goin' off lookin' for bearing, etc ain't exackly, uh...reelapeelin', if ya know what I mean...
  ... 8) ...