Console, T-top, deck and more...

Curapa

Junior Member
I have been pretty busy lately. I built a t-top for my boat a couple of years ago and it broke a little bit back. Completely my fault as I tried to tow my buddies 15' Bass Tracker with a rope tied off to the top. It was one of those "F" it moments where a bit of alcohol is involved and you can imagine how the rest of the story goes.

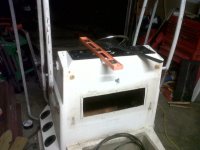
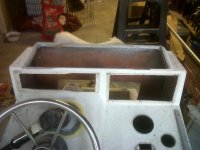
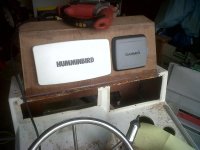
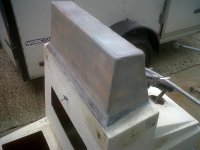
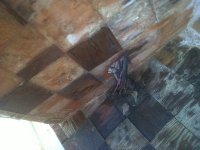
I was not very happy with the original design anyways, it lacked some curves and the top was a bit too big for my taste. I decided to mount the new top to the console instead of the deck to save valuable foot room in my 18 footer. Since I was removing the console I decided to tackle a few more projects like modifying my console to flush mount my electronics, adding a splash-well and fixing a soft spot in the deck.

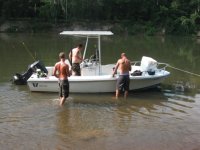
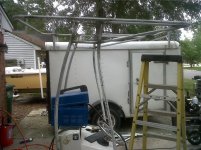
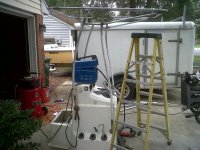
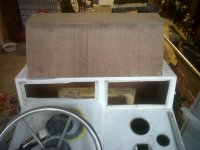
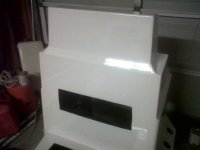
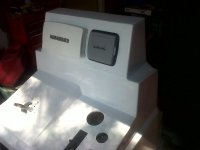
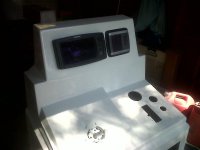
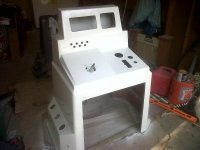
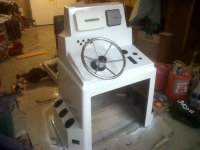
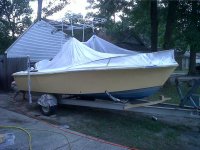
Pics of original top and new design. The new top will be painted white like the original.
 

Attachments

  • 1.jpg
    1.jpg
    54.1 KB · Views: 203
  • IMG00339-20110904-1600.jpg
    IMG00339-20110904-1600.jpg
    94.9 KB · Views: 191
  • IMG00340-20110904-1601.jpg
    IMG00340-20110904-1601.jpg
    89.2 KB · Views: 172
Modifications to the console.
 

Attachments

  • IMG00337-20110831-0130.jpg
    IMG00337-20110831-0130.jpg
    54.3 KB · Views: 103
  • IMG00345-20110910-1920.jpg
    IMG00345-20110910-1920.jpg
    63.9 KB · Views: 99
  • IMG00344-20110910-1919.jpg
    IMG00344-20110910-1919.jpg
    58.7 KB · Views: 98
  • IMG00347-20110911-1556.jpg
    IMG00347-20110911-1556.jpg
    56.6 KB · Views: 121
  • IMG00388-20110918-1538.jpg
    IMG00388-20110918-1538.jpg
    54.6 KB · Views: 103
I still have another coat of paint to apply to the console. I am also making an electronics box for my new radio and the VHF.

I still have a lot to do so there will be more pics to come.
 

Attachments

  • IMG00416-20110925-1437.jpg
    IMG00416-20110925-1437.jpg
    35 KB · Views: 111
  • IMG00433-20110928-2245.jpg
    IMG00433-20110928-2245.jpg
    38.3 KB · Views: 101
  • IMG00413-20110924-2233.jpg
    IMG00413-20110924-2233.jpg
    50.4 KB · Views: 99
Wow Curapa... nice glass work there!!...and yer right about the curves in the top...definately adds to the overall look...keep the pics coming...GREAT WORK!!...wanna see the finished console!!...:clap::clap::clap:
 
Looking good there. :clap:

Reminds me a bit of the lines on my T-Top.

DSCF0358.jpg

DSCF0361.jpg

DSCF0360.jpg

DSCF0431.jpg
 
Thanks guys.

Ridge, I bent the tubing in a very shade tree fashion. I had a top to a trellis that was left over from a job (cut the wrong size). I clamped the tubing to one end and bent it around the curve. I carefully marked each tube at the bending points and they came out identical.

I should get the last coat of paint on the console today and maybe some sanding done on the electronics box.

Pic of the trellis I built a while back as an example.
 

Attachments

  • IMG00303-20101207-1706.jpg
    IMG00303-20101207-1706.jpg
    74.3 KB · Views: 69
Nice man...hardcore repairs and modifications you got going there. I want to build my own radar arch in the worst way...you are giving me inspiration.
 
Got the last coat on the console today and the holes cut / switches installed. I went with round switches with a small blue led when on.
 

Attachments

  • IMG00436-20110929-1230.jpg
    IMG00436-20110929-1230.jpg
    32.2 KB · Views: 66
  • IMG00437-20110929-1230.jpg
    IMG00437-20110929-1230.jpg
    34.7 KB · Views: 69
  • IMG00438-20110929-1607.jpg
    IMG00438-20110929-1607.jpg
    46.6 KB · Views: 69
The console is done.

I got working on the deck today. I pulled the fuel tank cover to find some pretty wet foam. Believe it or not that is what I was hoping for. The boat sits kind of far in the water and I was hoping to find some unwanted weight in the foam. I will have to further inspect the foam to see just how bad it is.

I was undecided on whether to take the whole deck up or just the part I knew was bad. I decided to pull up only the bad. Looks like I will have to take a little more out down the side. I was surprised to see only 1/2" coring, for some reason I was expecting 3/4". I am glad I did not already buy a sheet of 3/4" as I came close to doing. The top separated from the core pretty easily.
 

Attachments

  • IMG00441-20110930-1856.jpg
    IMG00441-20110930-1856.jpg
    58.5 KB · Views: 69
  • IMG00442-20111002-1555.jpg
    IMG00442-20111002-1555.jpg
    70.6 KB · Views: 68
  • IMG00444-20111002-1556.jpg
    IMG00444-20111002-1556.jpg
    38.6 KB · Views: 71
  • IMG00453-20111002-1738.jpg
    IMG00453-20111002-1738.jpg
    59.5 KB · Views: 65
  • IMG00455-20111002-1756.jpg
    IMG00455-20111002-1756.jpg
    60.5 KB · Views: 62
Awesome work you are definitely taking that console to the next level. Great looking T-top as well by the way she's got nice curves.
 
Silly Question but after you cut the floor out like that do you just re-glass in the piece and then paint the floor or do you have some other technique?
 
VW, I set the saw depth to cut the top skin and plywood core leaving the bottom fiberglass skin in tact. When the core is removed I will epoxy the new core and top skin back. The top skin will get ground around the edges of the cut and fiberglass cloth will cover the joint. I have non-skid molded into my deck so the whole think will get epoxy faring to fill in the non-skid pattern. I then will paint the whole topside and roll on new non-skid.
 
Very nice work. Do you need special tools to bend the aluminum tubing, or just clamp it along the wood template? I'd like to try that, as opposed to the $2,000 purchase route.
 
Very nice work. Do you need special tools to bend the aluminum tubing, or just clamp it along the wood template? I'd like to try that, as opposed to the $2,000 purchase route.


It's actually EMT galvanized tubing. You can bend up to 1 1/4" by hand pretty easily, any bigger and it gets tough. I have made several things out of the EMT, the only thing is it has to be painted but only because the welds will rust. If I had a TIG welder I would have gone the aluminum route. I had about $70 in the first t-top and only about $10 in the new one because I reused most of it.
 
Hey Man...I's just eyeballin' yer handywork on the new top...when I spotted another Wellcraft logo peekin' around back of your work trailer...whatcha hidin back there???...
 
It's the same boat. She got a paint job a while back and is now "fighting lady yellow".
 

Attachments

  • IMG00097-20100710-1725.jpg
    IMG00097-20100710-1725.jpg
    94.6 KB · Views: 35
Back
Top